TL;DR
- Complete Chapter 5’s optional Layover challenge by finding two hidden landing zones for your cyber-dragon mount
- Defeat the Titan guarding the left tower first landing zone to unlock health upgrade rewards
- Navigate to the central circular arena with three pillars for the second landing zone encounter
- Employ strategic positioning to handle multiple Titans simultaneously in the final combat area
- Secure valuable weapon skins, gold, and rubies through successful challenge completion
Venture through The Holy City of Aratum during Chapter 5 to accomplish the optional “Layover” challenge, a rewarding side mission that enhances your gameplay experience.
Within Doom: The Dark Ages’ fifth chapter, titled “The Holy City of Aratum,” players must locate two concealed secret landing zones where you can safely land your airborne cyber-demon-dragon hybrid vehicle. Successfully completing this chapter’s “Layover” challenge provides substantial benefits despite being non-essential for main story progression.
These optional objectives deliver exceptional rewards ranging from premium currency like gold to exclusive weapon cosmetics and precious rubies used for equipment enhancement. Understanding the strategic value of these missions can significantly impact your resource accumulation and combat effectiveness throughout the campaign.
Our comprehensive Doom: The Dark Ages guide reveals precise locations for all secret landing zones associated with the “Layover” challenge, accompanied by detailed navigation instructions and combat strategies to ensure your success.
When initiating Chapter 5 “The Holy City of Aratum,” you’ll encounter a concise tutorial segment that familiarizes you with the flight mechanics of your draconic mount. Upon completing this orientation and obtaining an aerial view of the cityscape, you can immediately begin searching for the concealed landing locations.
Mastering the dragon’s mobility proves crucial for efficiently navigating between landing zones while avoiding unnecessary enemy engagements. Practice advanced maneuvers like rapid altitude changes and sharp turns during the tutorial to build muscle memory for the challenging aerial segments ahead.
Ensure your weapon loadout is optimized for both aerial combat and ground engagements before pursuing the landing zones. The BF6 Weapons Unlock Guide provides excellent insights into weapon selection strategies that translate well to Doom: Dark Ages’ combat dynamics.

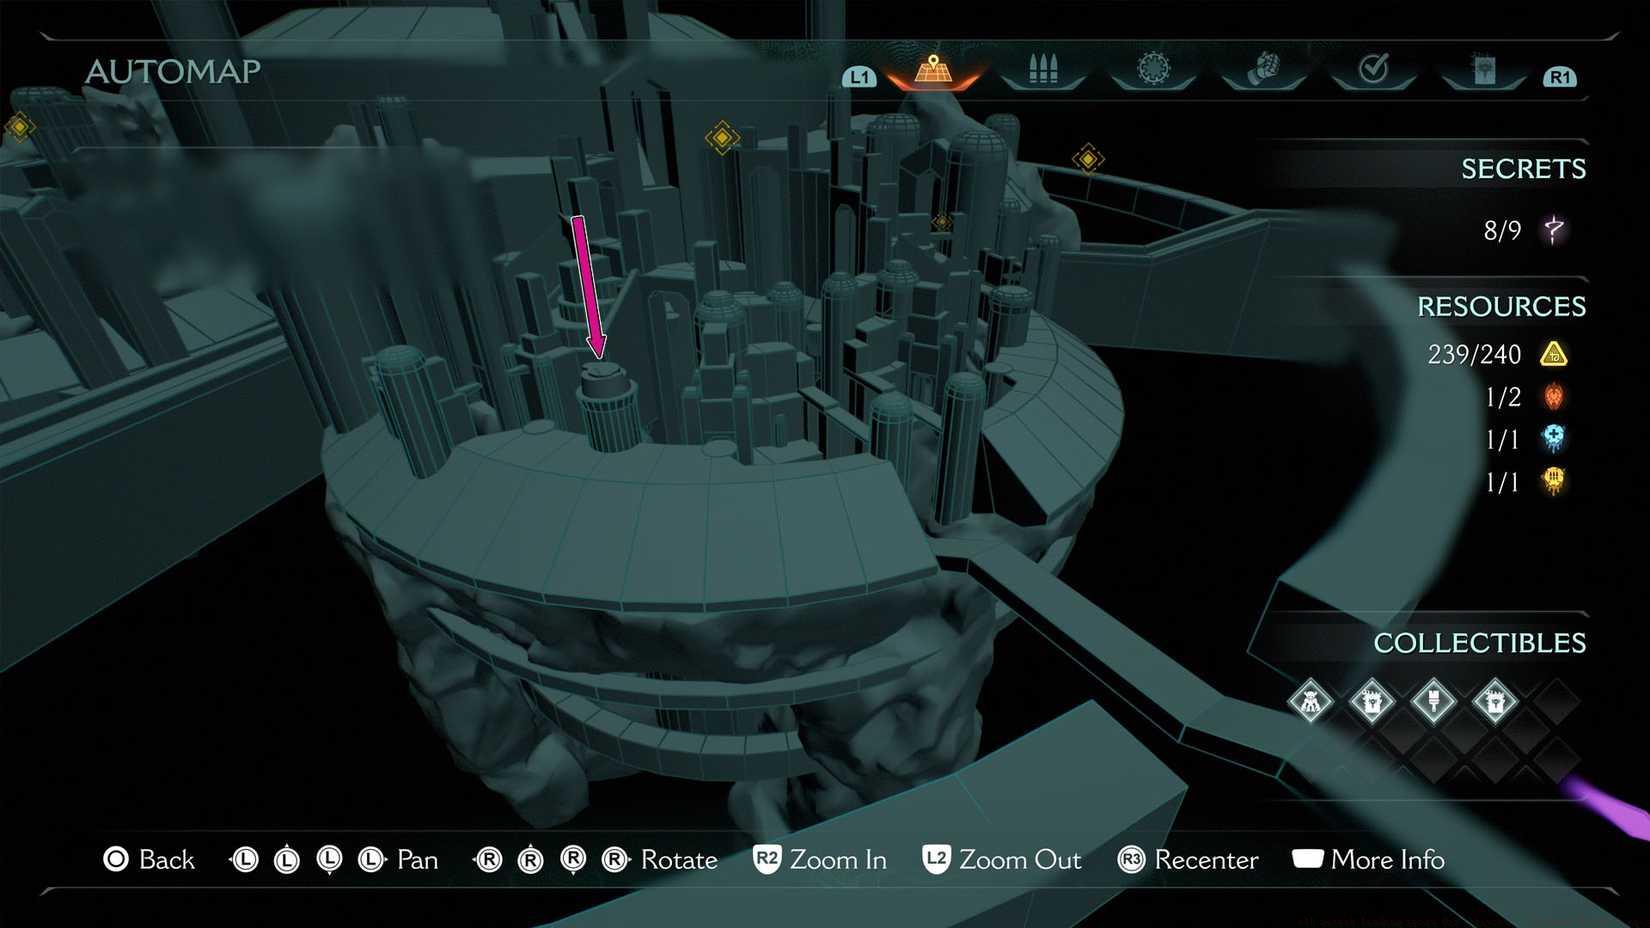
Image: id Software/Bethesda Game Studios via Polygon
The initial landing zone resides within a compact tower structure positioned to your left, protected by a formidable Titan. This identical demonic entity previously appeared during the chapter’s introductory tutorial sequence. Employ evasive maneuvers to avoid its projectile attacks while charging your weapon’s power, then eliminate the threat. The distinctive green navigation marker designating the landing area only materializes after the Titan’s defeat.
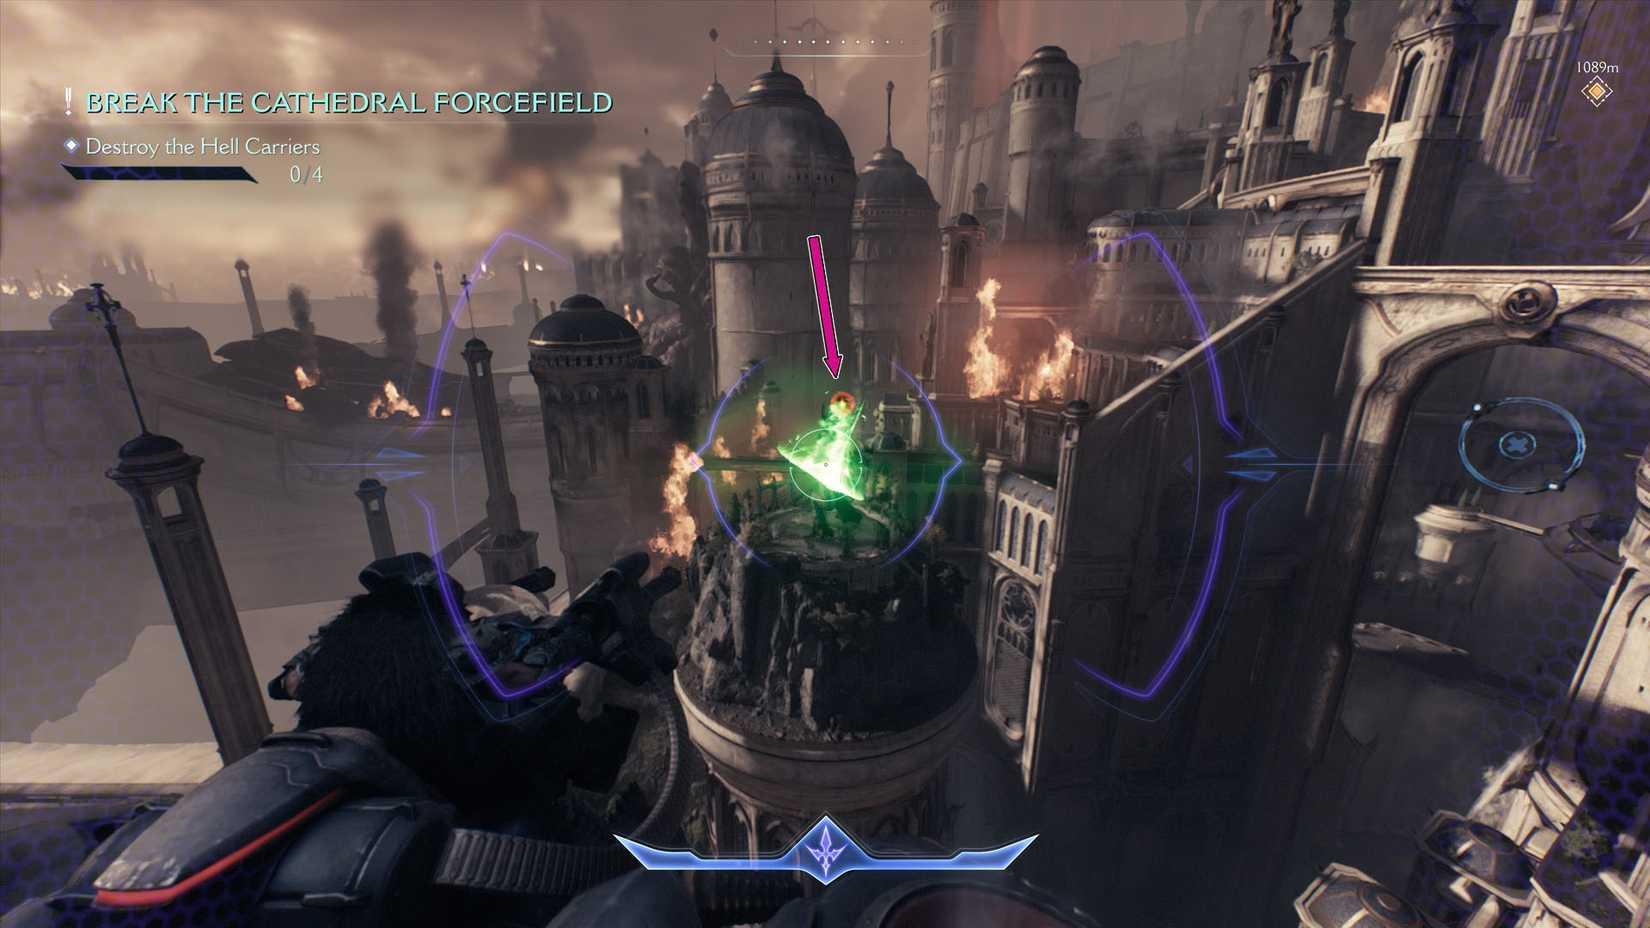
Image: id Software/Bethesda Game Studios via Polygon
Remain combat-ready, as immediately upon disembarking in the landing zone, demonic forces will emerge – including a commanding elite unit. Securing victory in this confrontation is paramount since defeating the leader rewards you with a permanent health enhancement.
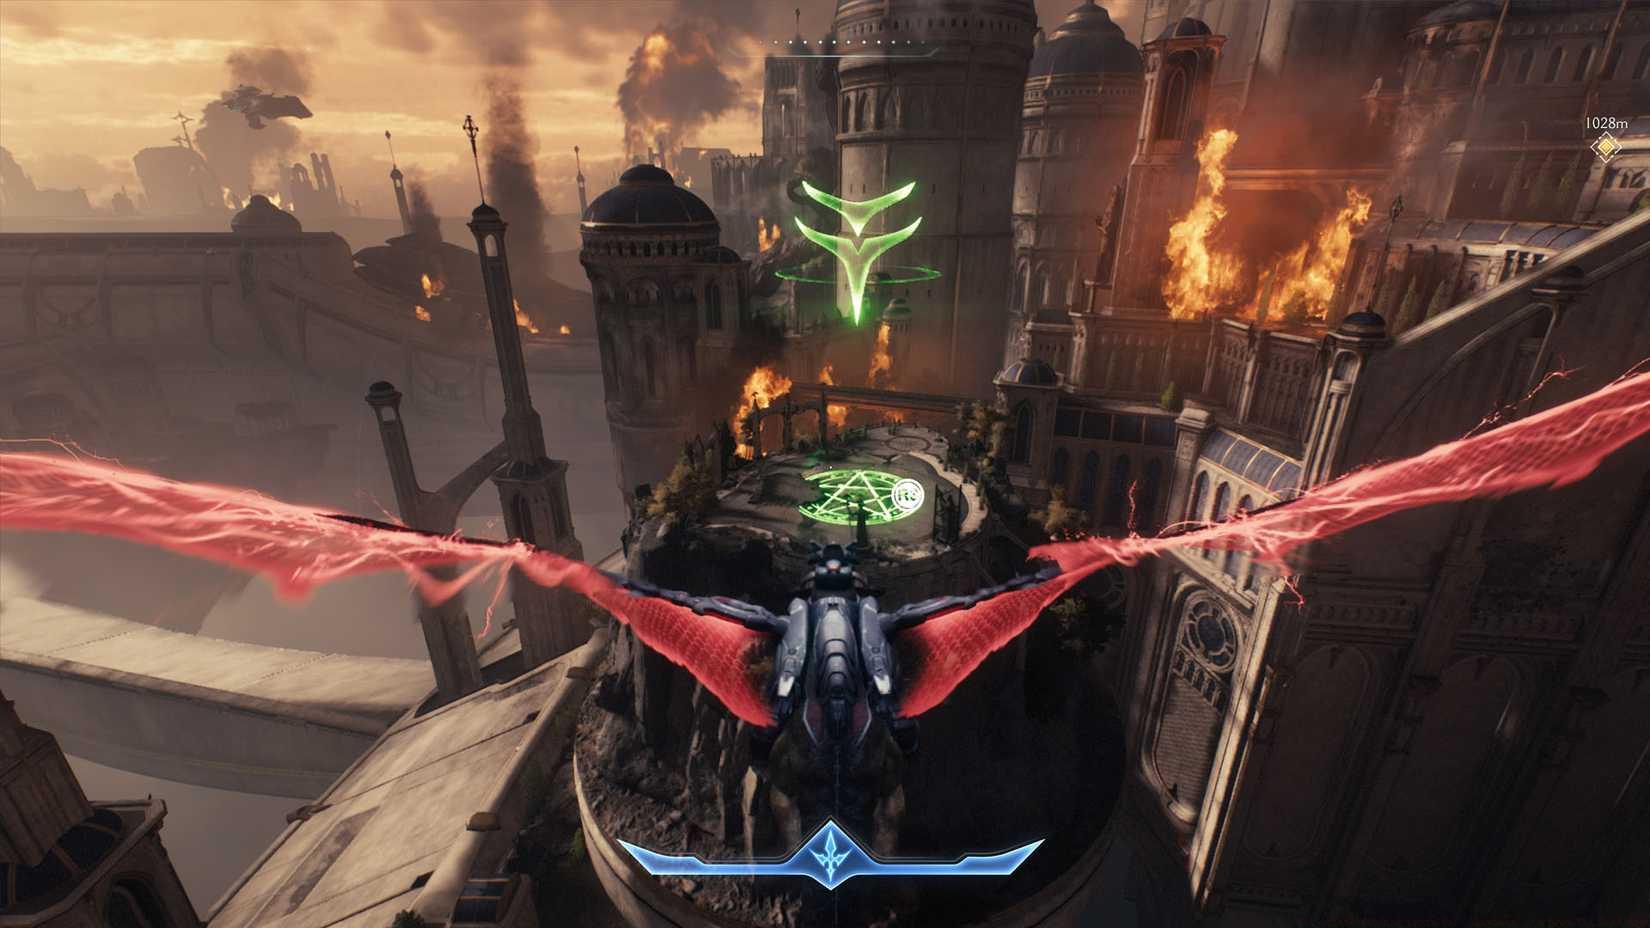
Image: id Software/Bethesda Game Studios via Polygon
After neutralizing all hostile entities in the vicinity, return to your aerial mount. You’re now prepared to locate the subsequent landing position, applying lessons learned from this initial engagement to the more complex encounter ahead.
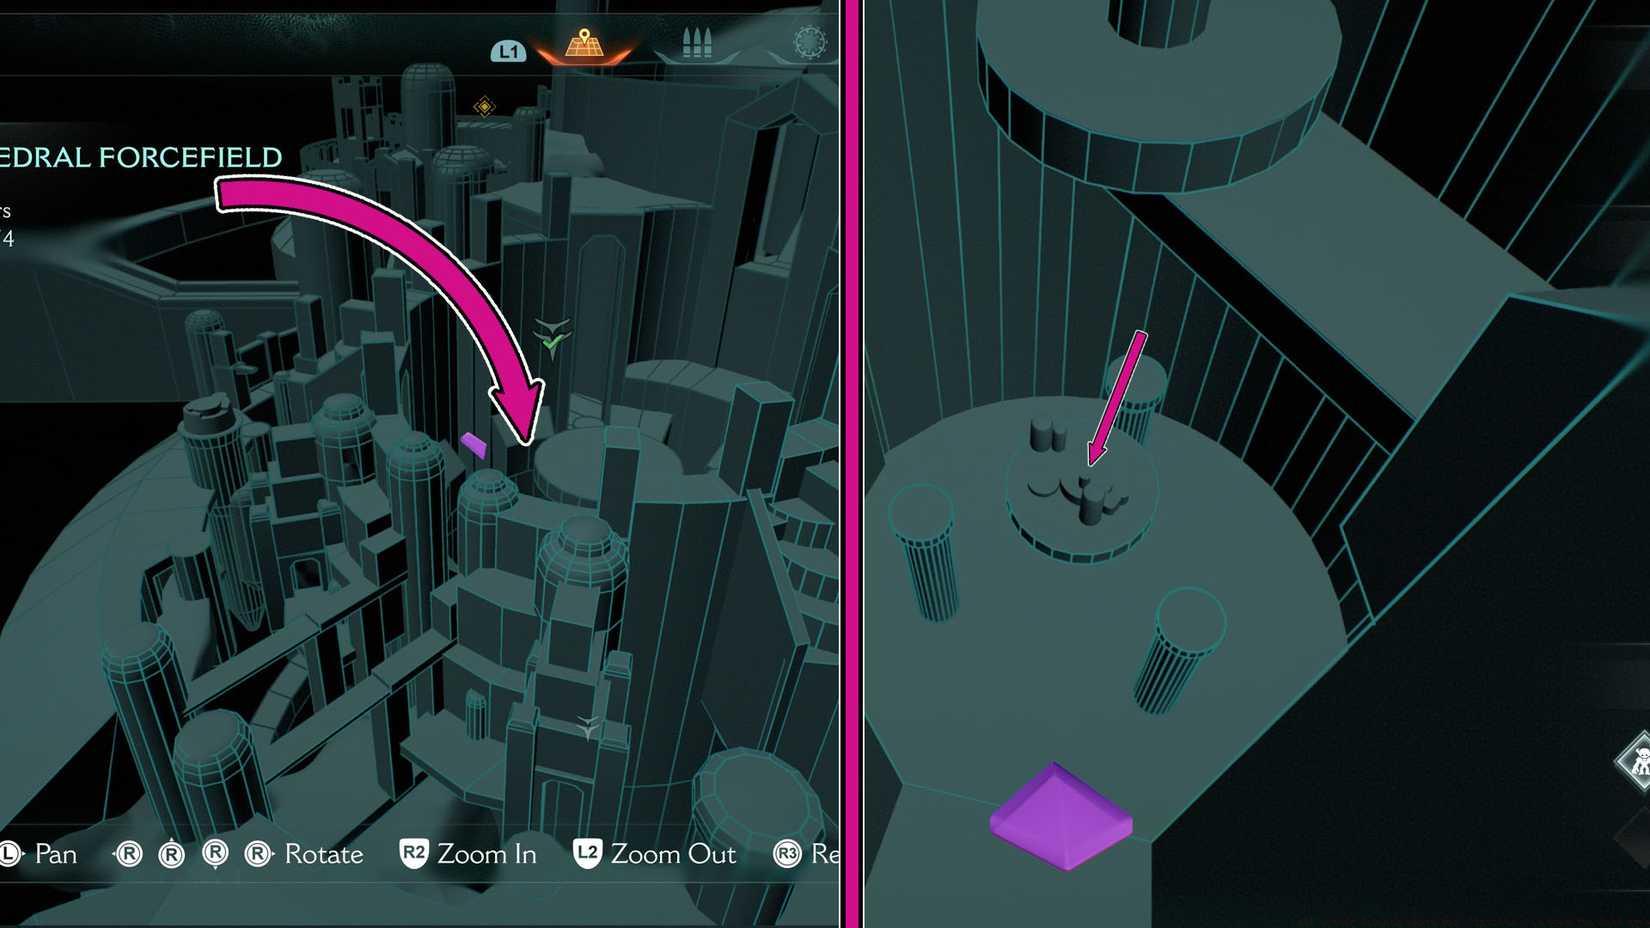
Image: id Software/Bethesda Game Studios via Polygon
To discover the ultimate secret landing zone in Chapter 5, navigate toward the city’s central district and descend to its deepest level. At the base elevation, you’ll encounter a circular central plaza bordered by three substantial pillars.
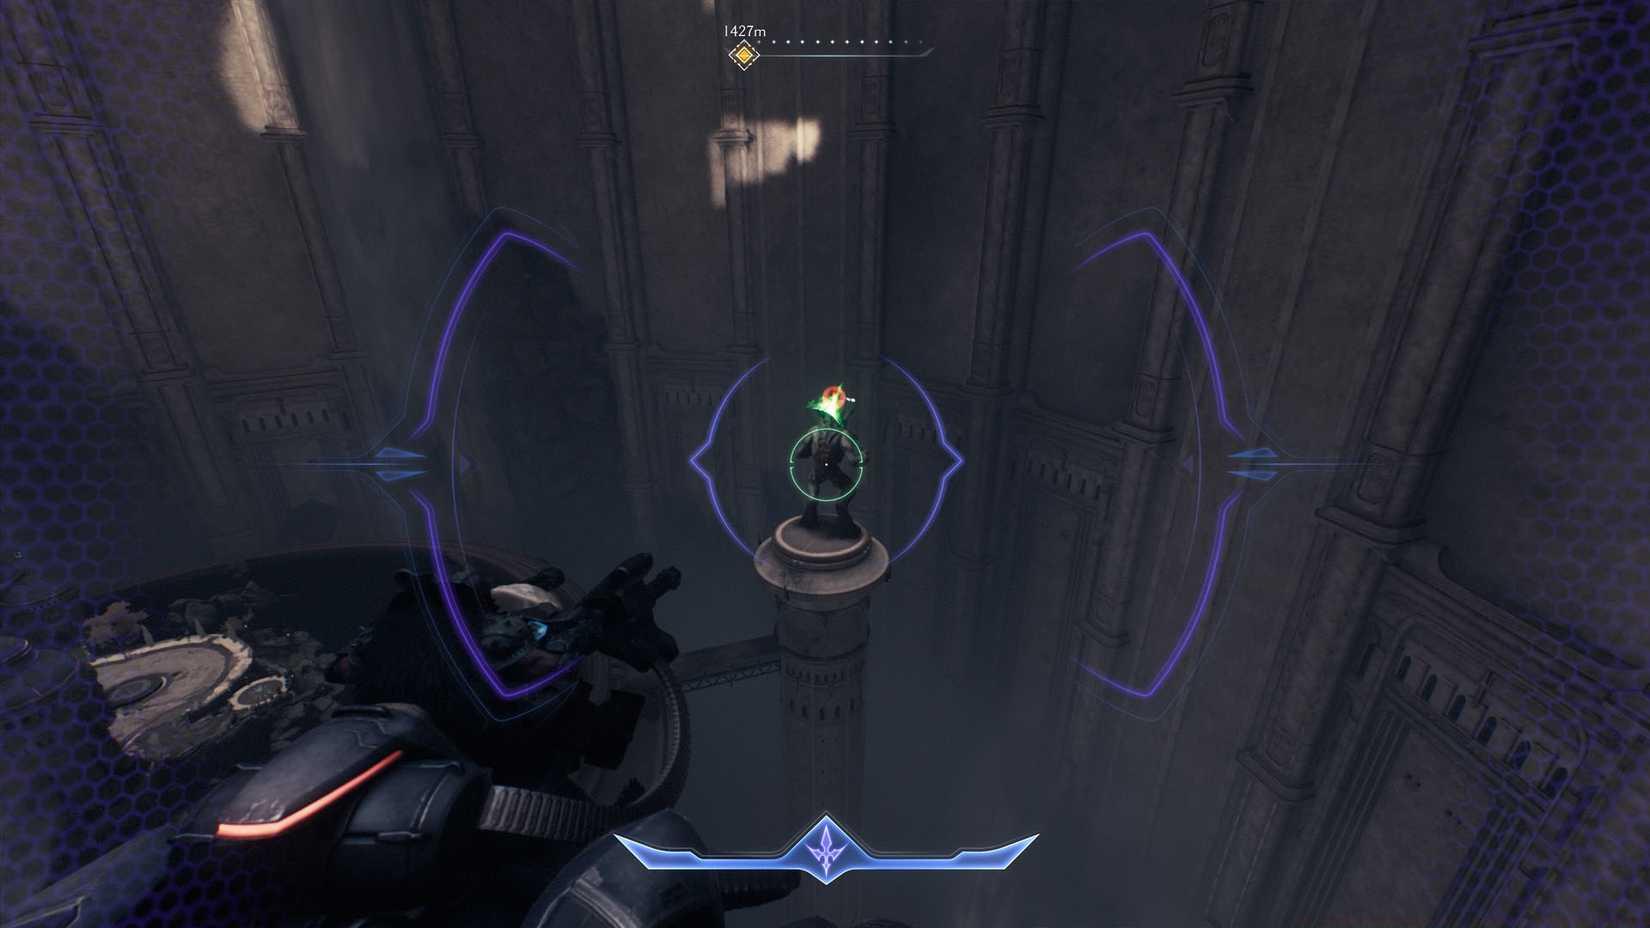
Image: id Software/Bethesda Game Studios via Polygon
Two of these pillars host Titan sentries that immediately initiate aggressive bombardment upon detecting your presence. Implement tactical engagement by focusing on one Titan while maintaining considerable distance from its counterpart. This strategic positioning prevents the necessity of simultaneously evading multiple projectile volleys, significantly increasing survival probability.
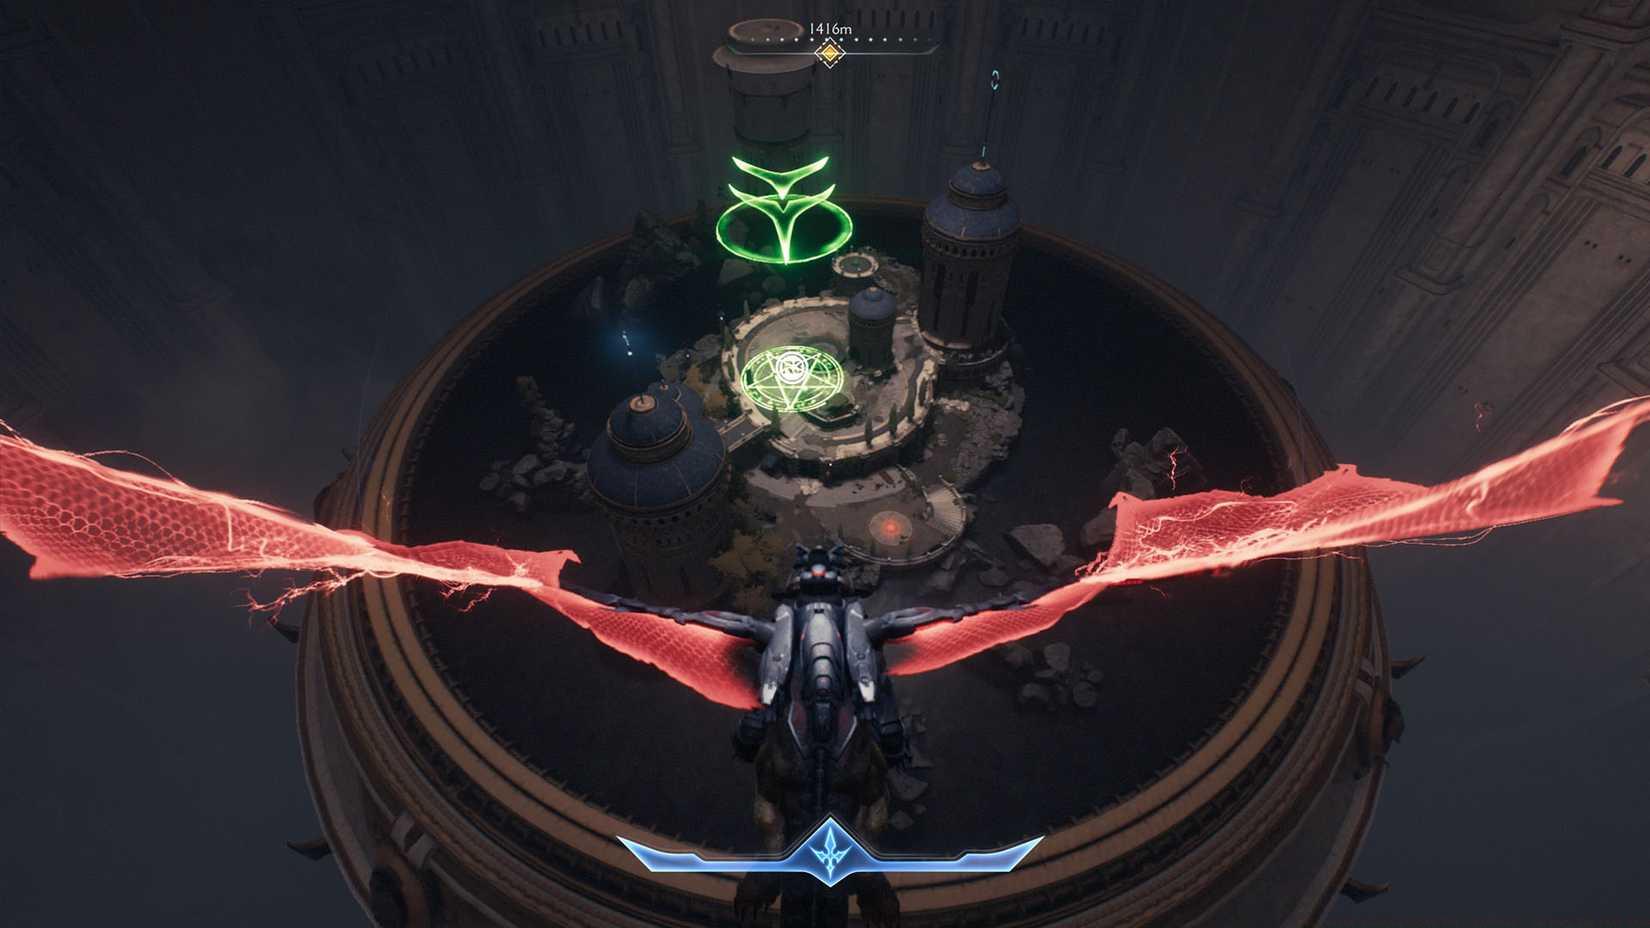
Image: id Software/Bethesda Game Studios via Polygon
The circular arena design provides natural cover opportunities between pillar structures. Utilize these environmental features to break line-of-sight and create openings for counterattacks. Understanding class-specific tactics from our Class Guide can enhance your approach to these complex multi-enemy engagements.
Successfully completing both landing zone encounters requires more than basic combat proficiency. The weapon enhancement system responds to precise timing – dodge Titan projectiles at the last possible moment to maximize charge efficiency. This technique proves particularly effective against the dual Titan configuration in the second landing zone.
Common mistakes include rushing the landing process before thoroughly clearing enemy forces or attempting to engage both Titans simultaneously in the circular arena. Patiently methodical approaches yield superior results, as the health upgrade from the first zone’s leader demon provides crucial survivability for the more demanding second encounter.
Advanced players can optimize their route by completing the first landing zone immediately after the tutorial, then proceeding directly to the central arena. This efficient path typically requires 15-20 minutes for skilled players but may extend to 30 minutes for those learning the mechanics. The Battlefield 6 Complete Guide offers additional strategic principles that apply to objective-based challenges like the Layover mission.
Weapon upgrade rubies obtained from these challenges should prioritize damage output and reload speed enhancements, as these attributes significantly impact Titan elimination efficiency. Consider saving gold for exclusive weapon skins that occasionally provide minor statistical advantages alongside cosmetic improvements.
Action Checklist
- Complete dragon flight tutorial and master advanced aerial maneuvers
- Navigate to left tower, defeat the Titan guardian, and claim first landing zone
- Eliminate demon leader in first zone to secure permanent health upgrade
- Fly to central city arena, engage Titans strategically using pillar cover
- Complete both zones to receive gold, weapon skins, and enhancement rubies
No reproduction without permission:Game Guides » All secret landing spots for ‘Layover’ in Doom The Dark Ages Master Doom: Dark Ages' Layover challenge with expert strategies for both secret landing zones and valuable rewards