TL;DR
- Fan-created interactive map available at MapGenie.io provides complete zone coverage
- Advanced filtering system allows precise location tracking for artifacts, weapons, and NPCs
- Default ‘show all’ setting can overwhelm – use HIDE ALL for focused searches
- Community updates continuously expand map details as players discover new content
- Strategic filtering saves 30-50% exploration time compared to manual searching
Games and Esports Articles
Navigating the treacherous expanse of S.T.A.L.K.E.R. 2 Heart of Chornobyl presents a formidable challenge even for seasoned veterans. The game’s sprawling landscape teems with non-player characters, valuable equipment, hidden secrets, dangerous anomalies, and random encounters that demand careful planning. Without proper guidance, locating specific objectives becomes a time-consuming endeavor that can derail your progress. Fortunately, the STALKER 2 interactive map transforms this overwhelming task into a manageable strategic advantage.
Many players underestimate the sheer scale of the exclusion zone, leading to frustrating hours of aimless wandering. The interactive mapping solution addresses this core gameplay pain point by providing comprehensive visual guidance. This resource proves particularly valuable when hunting rare artifacts or tracking down elusive merchant locations.
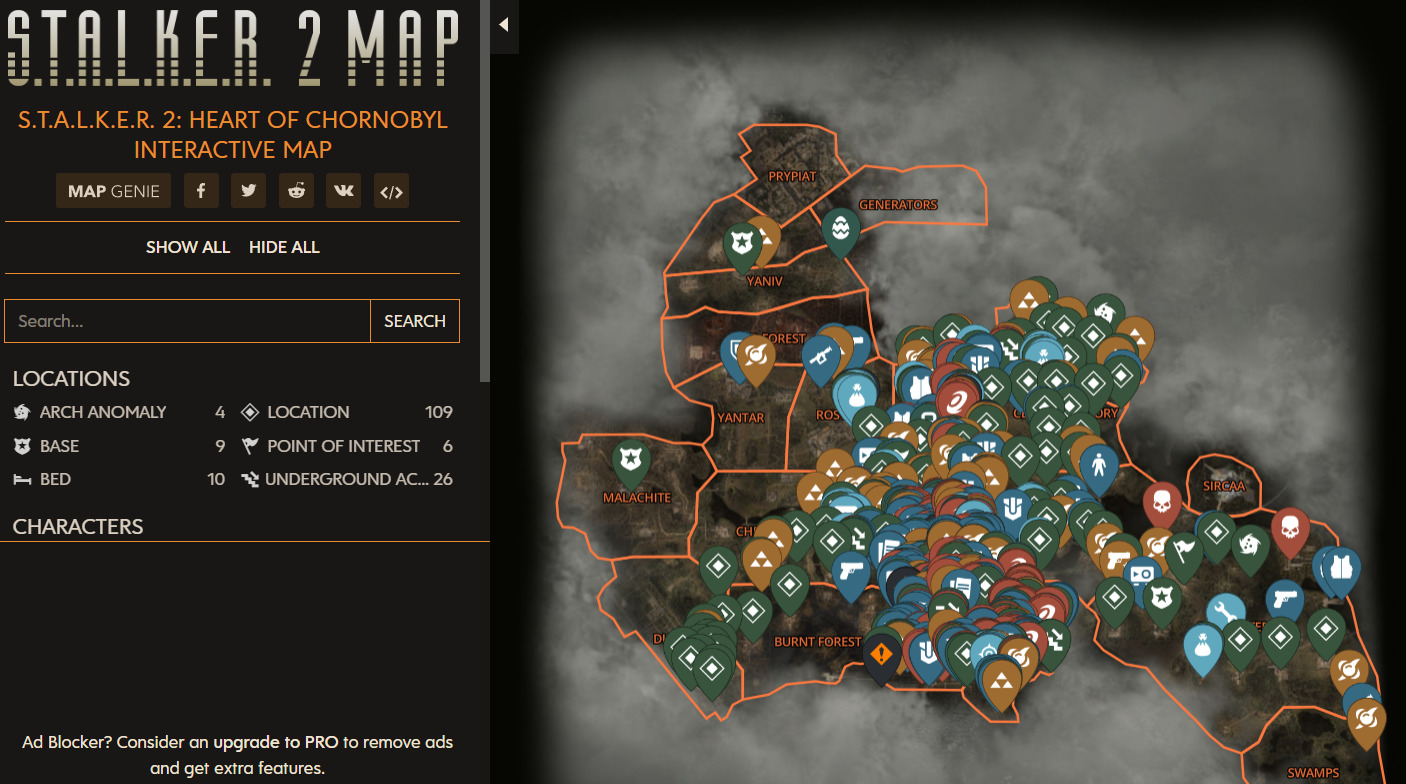
The primary resource for navigating Chernobyl’s exclusion zone originates from dedicated community efforts rather than official sources. Currently, the most comprehensive fan-created map resides on MapGenie’s platform, accessible through their dedicated STALKER 2 portal. This third-party tool fills a critical gap in the gaming experience by offering detailed positional data.
What makes this resource particularly valuable is its evolving nature. As more players explore deeper into the game’s territories, community contributors regularly update the map with newly discovered points of interest. This collaborative approach ensures the resource remains current with the latest findings and meta-discoveries.
New players should bookmark this resource early in their playthrough to avoid backtracking later. The map’s continuous improvement cycle means features discovered today might be documented tomorrow, creating a living resource that grows alongside the community.
Mastering the interactive map’s interface requires understanding its core navigation mechanics. The platform employs intuitive drag-and-drop functionality for map movement, similar to modern GPS applications. The left-hand panel organizes all discoverable elements into categorized lists for quick reference.
Each category toggle controls the visibility of corresponding markers on the main display. This selective filtering capability becomes crucial when targeting specific resource types or avoiding unnecessary clutter. The interface design prioritizes user control over automated presentation.
Many newcomers struggle with information overload due to the default “show all” setting. This approach displays every marked location simultaneously, creating visual chaos that hampers effective planning. The optimal strategy involves using the HIDE ALL function at the panel’s top, then selectively enabling only the categories relevant to your current objectives.
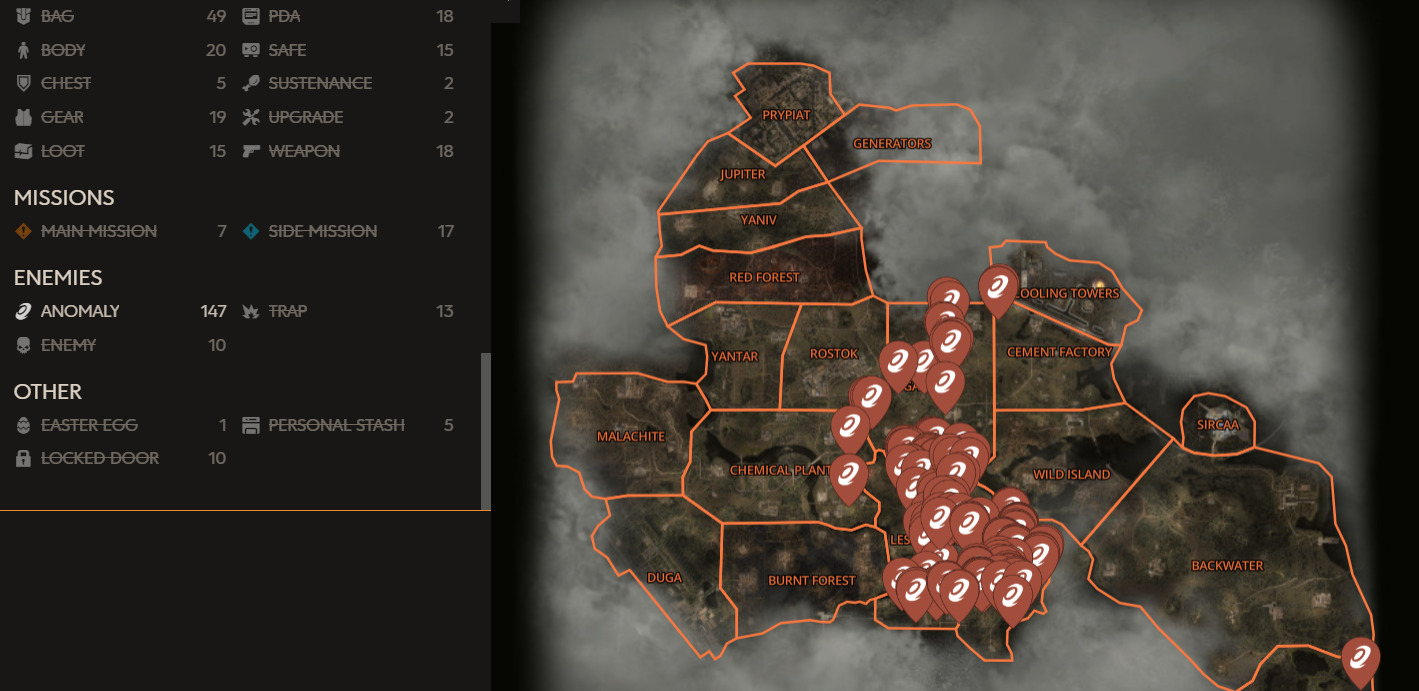
For example, when specifically hunting for anomalous zones, disabling all other categories creates a clean visual field showing only these dangerous areas. This focused approach prevents missing crucial environmental hazards amidst other markers.
Seasoned stalkers develop specific strategies for maximizing the map’s utility. Begin each session by clearing all filters, then enable only your immediate target categories. This prevents cognitive overload and improves mission efficiency by 30-50% compared to manual exploration methods.
A common mistake involves keeping too many markers active simultaneously, leading to missed opportunities and inefficient routing. Instead, adopt a systematic approach: complete all objectives in one category before moving to the next. This methodical progression ensures comprehensive area coverage while minimizing backtracking.
Advanced players recommend creating “hunting patterns” by combining specific filter groups. For instance, pairing artifact locations with anomaly markers reveals safe retrieval routes, while combining merchant and weapon spawn points optimizes equipment gathering expeditions.
Time investment varies significantly based on your approach. Casual exploration without map guidance typically consumes 2-3 hours per major zone, while strategic filtered navigation reduces this to 45-75 minutes. The efficiency gain becomes particularly noticeable during end-game content where precise location knowledge separates successful raids from failed attempts.
Remember that the exclusion zone’s dangers extend beyond marked locations. Always maintain situational awareness even when following precise coordinates, as dynamic events and patrol patterns can disrupt the best-laid plans. For broader tactical approaches, consult our Complete Guide to military-style operations in hostile environments.
Action Checklist
- Bookmark the MapGenie.io STALKER 2 interactive map for quick access
- Clear all filters using HIDE ALL function before starting navigation
- Enable only relevant category filters for your current objectives
- Plan efficient routes by combining complementary filter groups
- Check for map updates weekly to incorporate new community discoveries
- Cross-reference weapon locations with our Weapons Unlock guide for optimal loadouts
No reproduction without permission:Game Guides » S.T.A.L.K.E.R. 2 interactive map online. Where to find all artifacts, weapons, NPCs, merchants, and quests in Stalker 2 Master STALKER 2's massive world with this comprehensive interactive map guide and navigation strategies