TL;DR
- Complete four scattered objectives across Blue Gate in any order or single session
- Coordinate with squad members to divide tasks and complete objectives simultaneously
- Use precise map markers for difficult-to-find locations like Ridgeline observation deck
- Prepare for PvP encounters in high-traffic areas like Olive Grove
- Bring disposable loadouts to minimize risk during this dangerous early-game quest
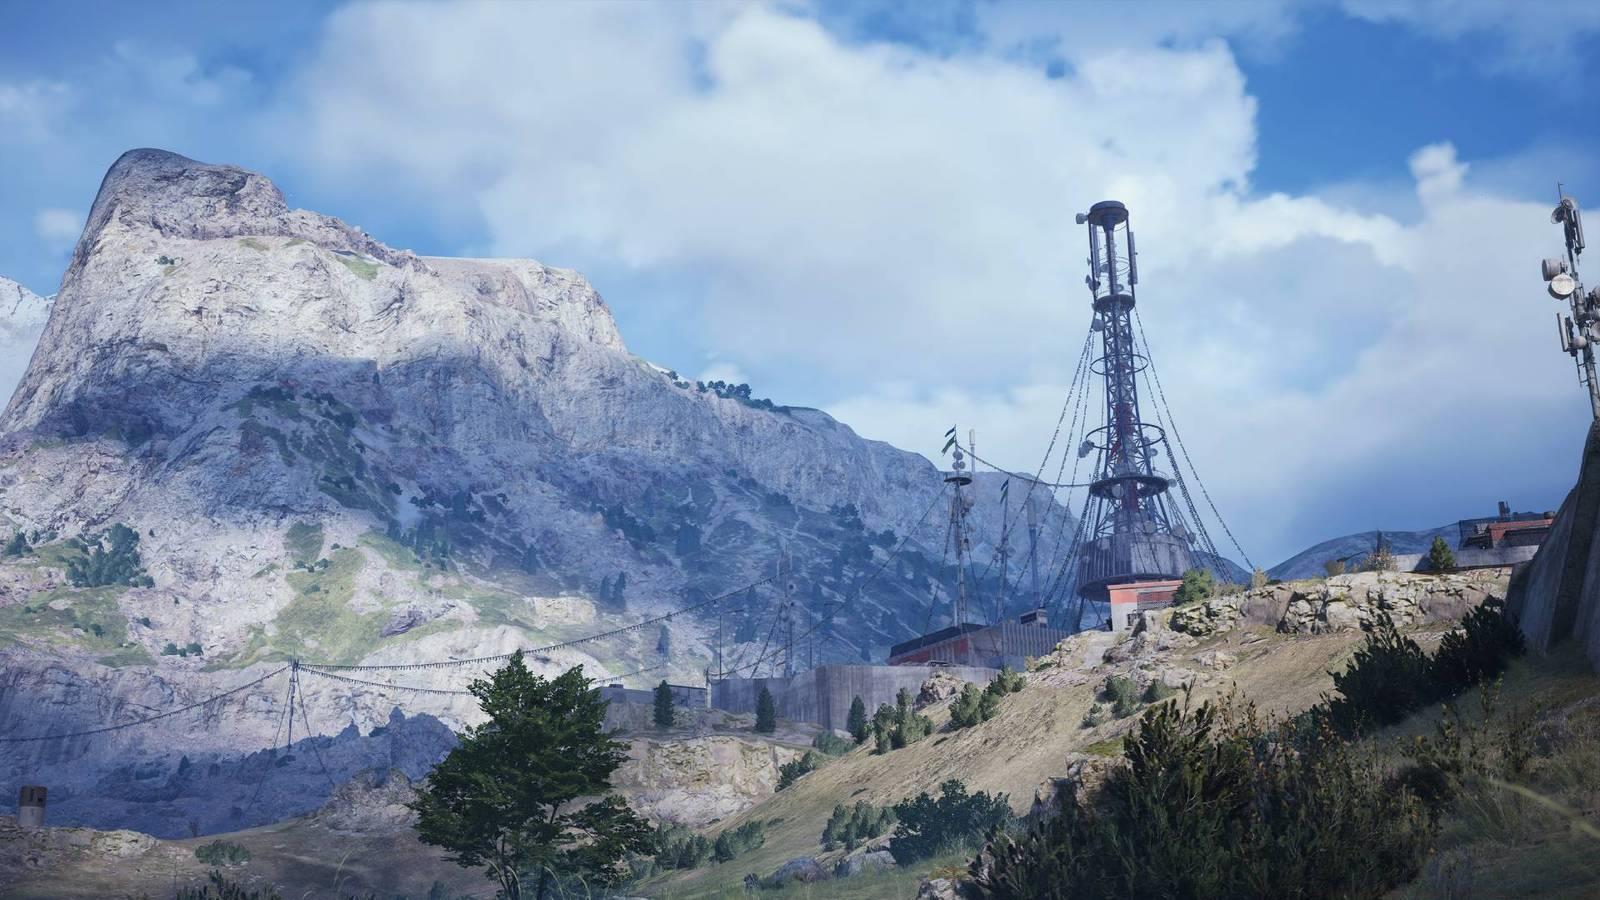
Navigating Blue Gate’s Expansive Terrain
The Arc Raiders “A First Foothold” quest sends players across diverse regions of the Blue Gate landscape to accomplish four distinct mission objectives. You’ll employ both technical skills repairing infrastructure and navigational expertise locating hard-to-find points of interest. This early-game assignment serves as your introduction to the map’s layout while testing your survival capabilities against environmental threats and opposing players.
Since this assignment becomes available immediately after unlocking Blue Gate access, most players lack familiarity with the terrain. Compounding the challenge, objective descriptions provide minimal directional guidance, forcing reliance on environmental cues and map interpretation. Additionally, you must remain vigilant against hostile ARC mechanoids and competing raiders seeking to eliminate competition.
Our comprehensive guide details precise completion methods for “A First Foothold” in Arc Raiders, including exact locations and procedural steps for all required tasks.
Before embarking across Blue Gate, understand that objective completion doesn’t require specific sequencing or single-session accomplishment. The four tasks distribute across extensive territory, making opportunistic completion when spawning nearby the most efficient approach. This flexibility allows integration with other activities rather than dedicated quest runs.
For squads operating at full three-player capacity, mission completion accelerates dramatically through task distribution. Arc Raiders quest mechanics grant credit to all squad members whenever any teammate fulfills an objective. To maximize efficiency, assign each member a different task with instructions to complete independently. The final objective can be handled by the nearest available player after their initial assignment. Given the substantial risk of player encounters and ARC hostilities during this mission, we strongly recommend utilizing expendable loadouts or free default equipment to minimize potential losses.
Below we provide exact coordinates and procedural guidance for all four “A First Foothold” objectives, including navigation tips and threat awareness recommendations.
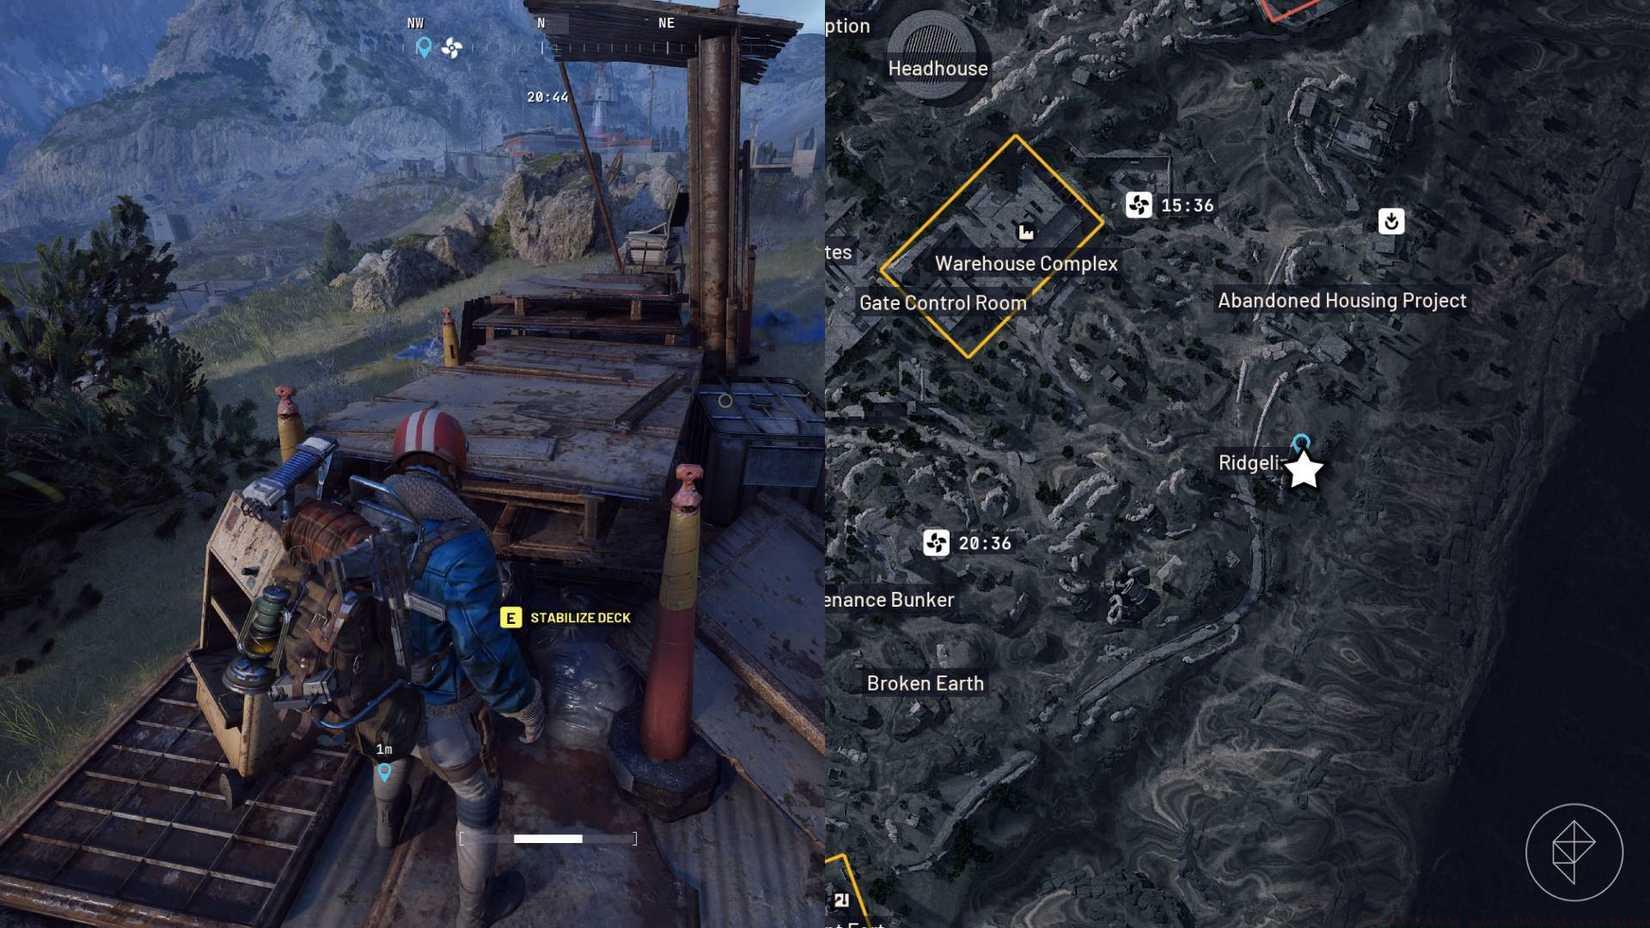
Image: Embark Studios via Polygon
Ridgeline Observation Deck: Located on the eastern extreme of Blue Gate, this objective proves challenging to locate without precise marking. Set your map marker precisely at the terminus of the “e” in “Ridgeline” on your overlay display. This directs you to a compact shelter structure containing interactive metal panels that require stabilization. Approach cautiously as this elevated position offers sightlines to multiple approach routes.
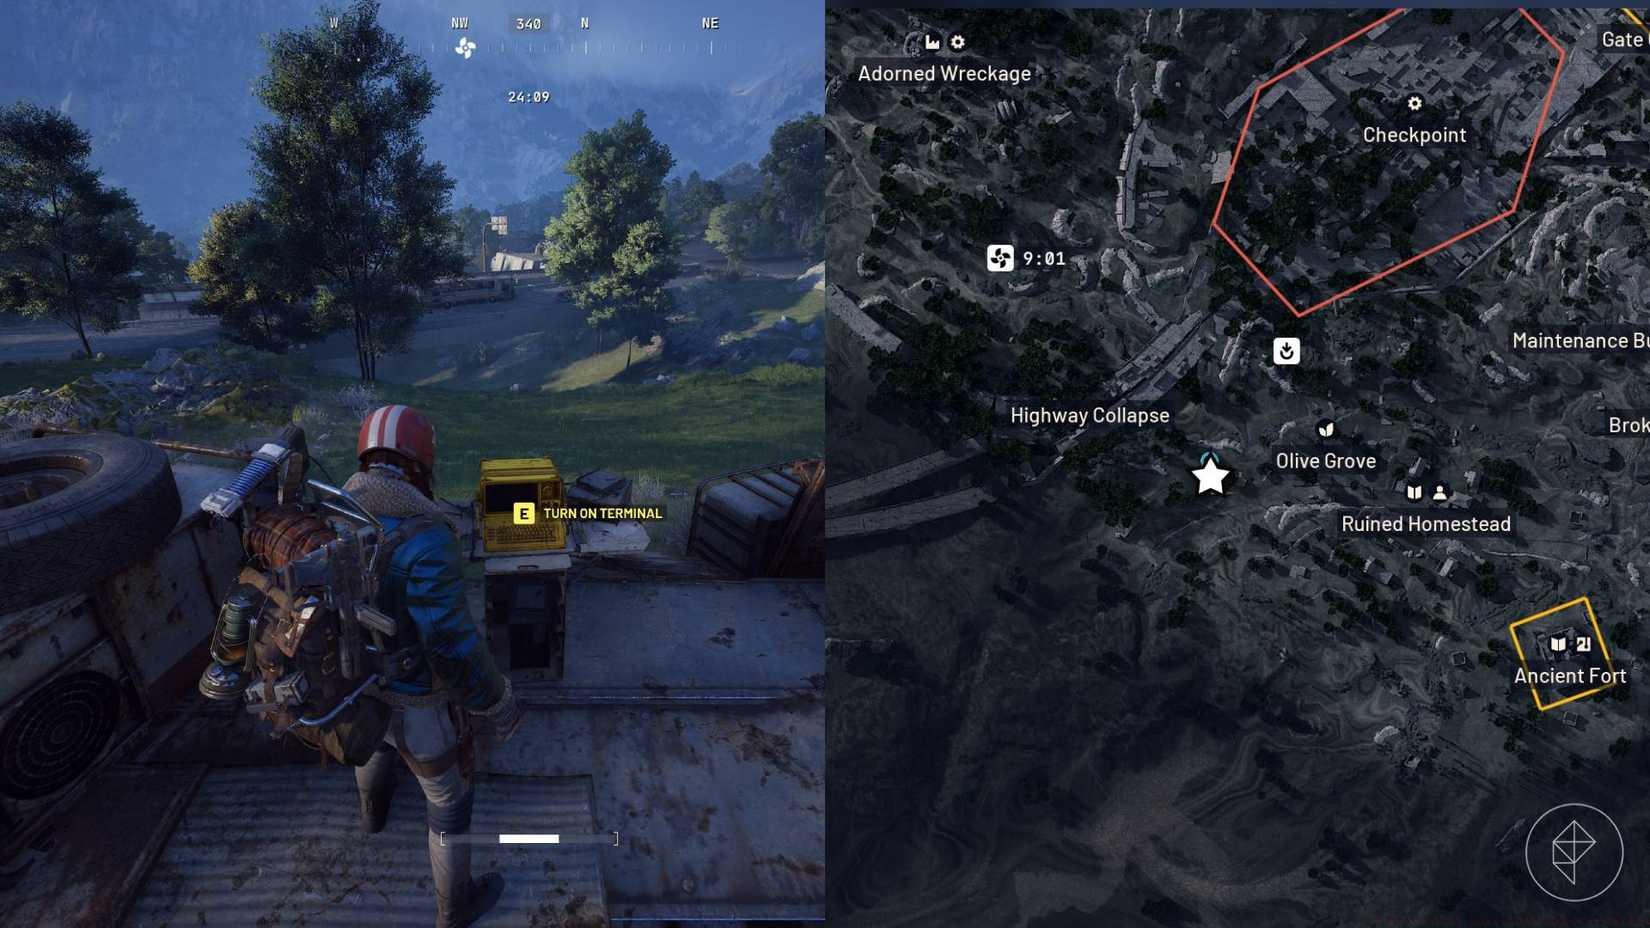
Image: Embark Studios via Polygon
Olive Grove Terminal: Situated between Olive Grove and Highway Collapse, locate the distinctive yellow computer terminal positioned overlooking the descending highway route. Exercise extreme caution here as Olive Grove represents a popular player engagement zone, particularly for those completing Assignments related to Scrappy progression. Consider nighttime approaches or rapid engagement-disengagement tactics to minimize exposure.
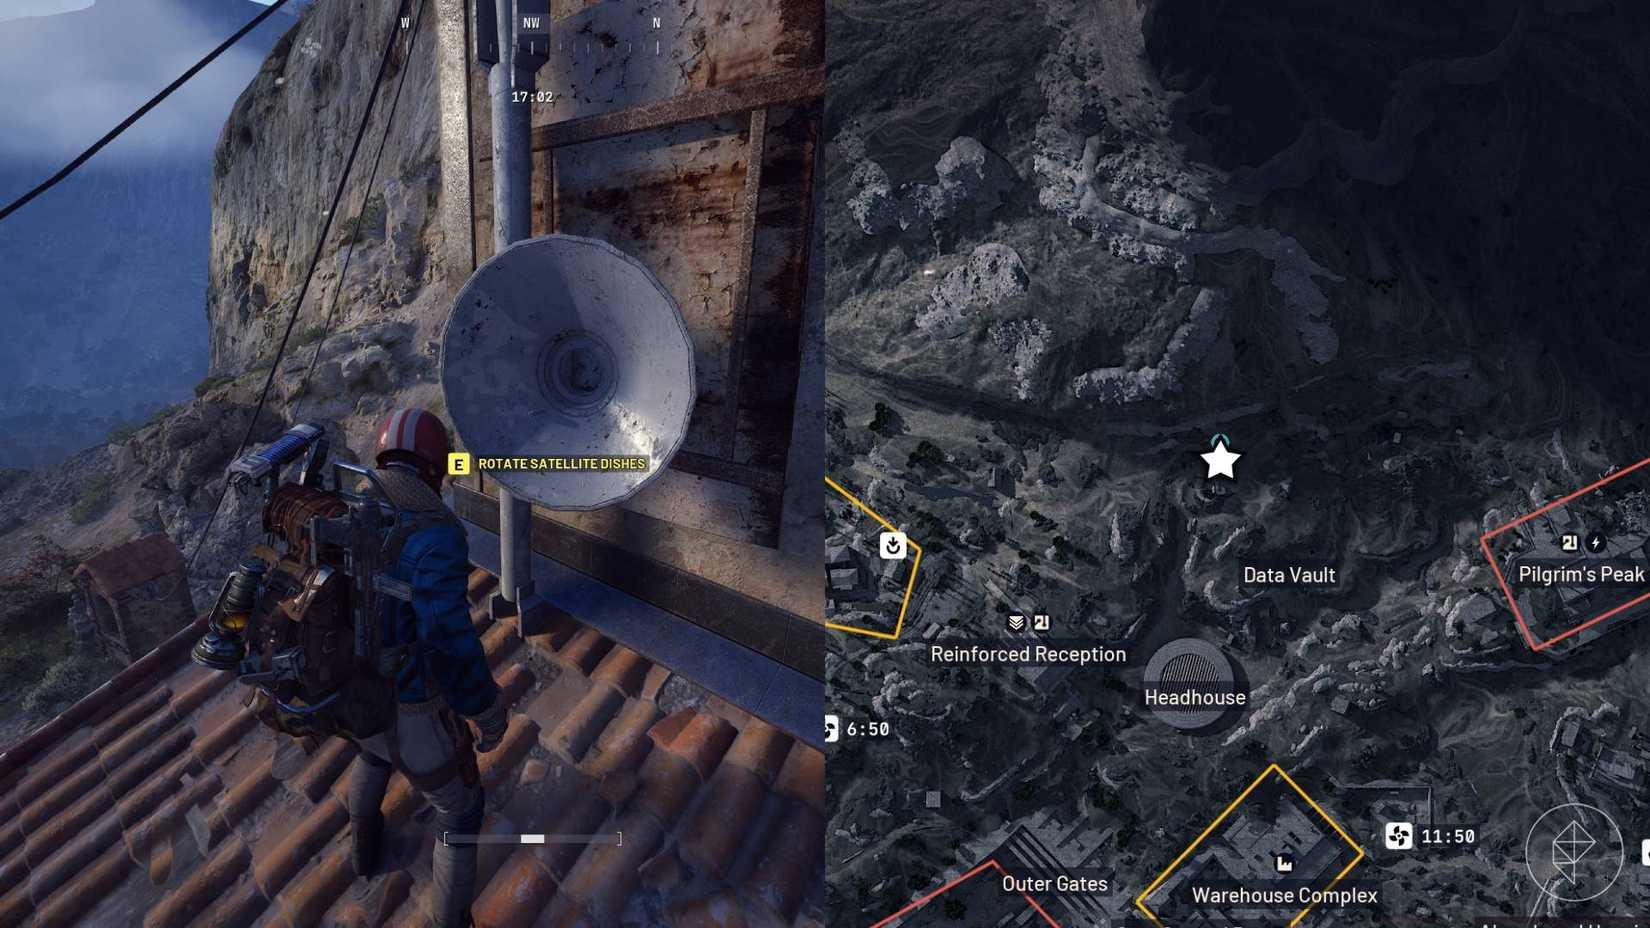
Image: Embark Studios via Polygon
Data Vault Satellite Dishes: Northwest of the Data Vault landmark and directly west of Pilgrim’s Peak, identify a deteriorated structure surrounded by storage crates with accessible rear scaffolding. Ascend to the rooftop using this framework and interact with the satellite array to complete calibration requirements. Execute this task rapidly and evacuate the elevated position immediately afterward to avoid becoming an easy target for snipers occupying surrounding high ground.
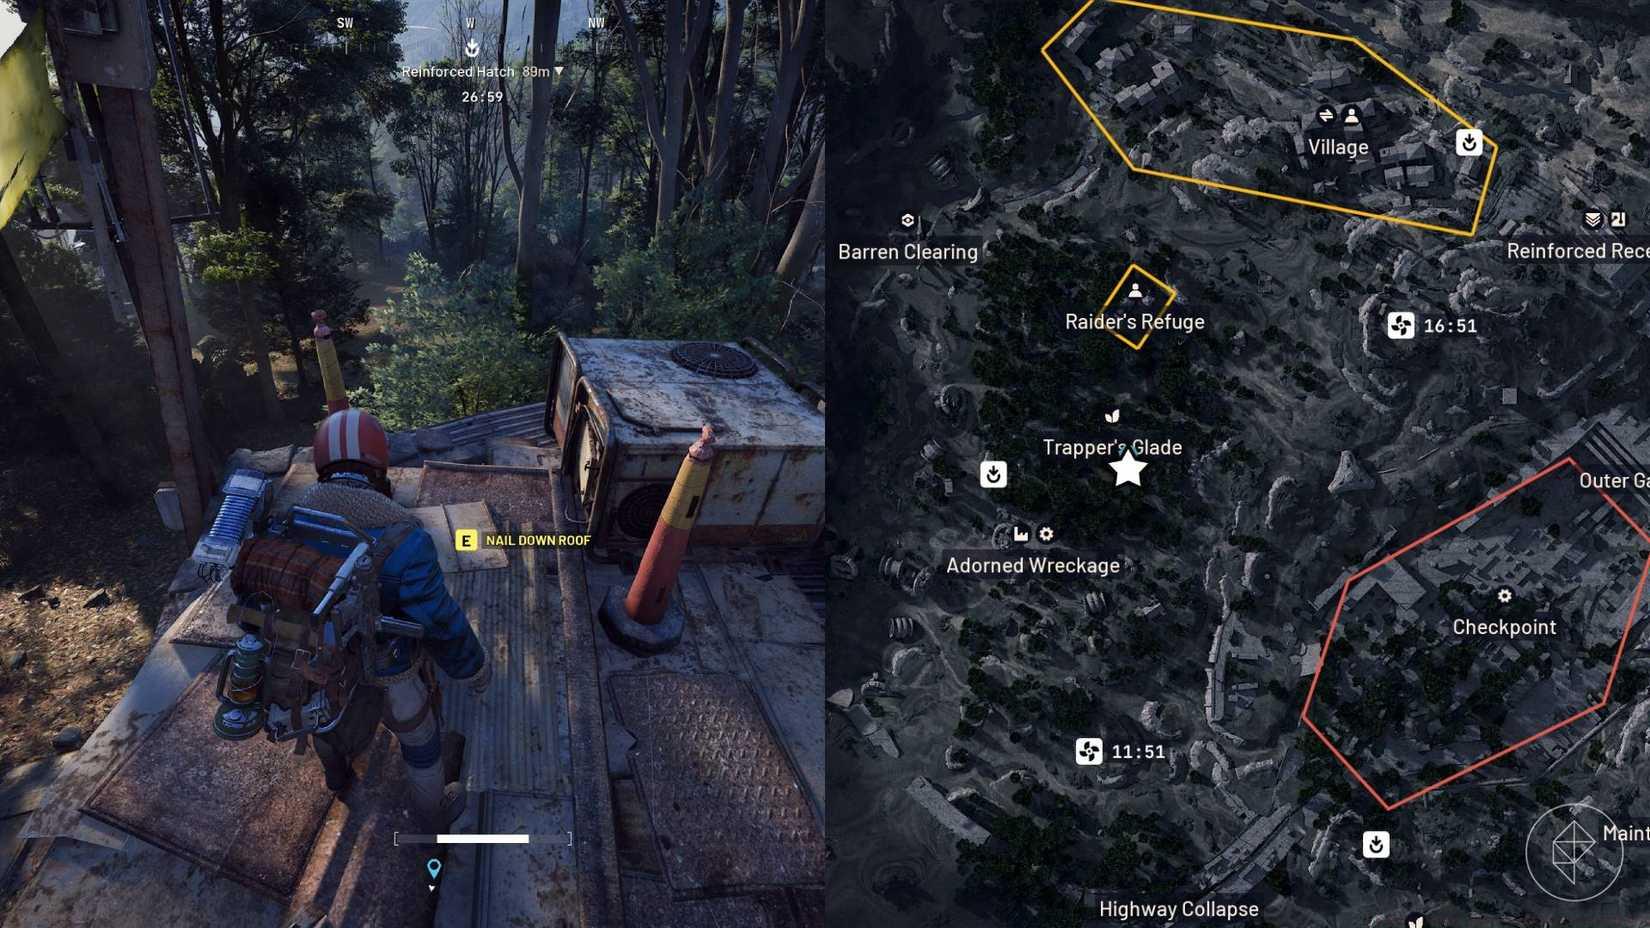
Image: Embark Studios via Polygon
Trapper’s Glade Objective: The fourth objective near Trapper’s Glade requires repairing damaged communications equipment. This area typically has moderate player traffic, so time your approach during lower-population server periods if possible. The equipment is located beside a partially destroyed concrete bunker with obvious antenna arrays visible from approach routes.
Beyond basic completion, several advanced strategies can optimize your “A First Foothold” experience while avoiding common mistakes that frustrate new players.
Enemy Encounter Management: ARC patrols follow predictable routes that can be memorized with repeated exposure. Time your objective approaches during patrol lulls, and always have an escape route planned. For player encounters, remember that not every confrontation requires engagement—sometimes evasion proves more efficient than combat, especially when using disposable loadouts.
Navigation Optimization: Utilize the map’s topographic features for cover during movement between objectives. Valleys and destroyed structures provide concealment from both ARC units and player snipers. When playing solo, consider completing objectives farthest from spawn points first while your inventory remains intact.
Loadout Recommendations: While the game suggests expendable equipment, certain gear choices improve survival odds. Prioritize mobility-enhancing items that facilitate rapid disengagement. Weapons with suppressors reduce attention drawn from nearby enemies. For those progressing through our BF6 Weapons Unlock guide, consider how unlocked equipment might transfer advantageously to Arc Raiders gameplay.
Common Mistakes to Avoid: New players frequently waste time searching for objectives without precise markers—always set exact map coordinates before embarking. Another common error involves underestimating travel time between objectives, leaving players exposed during dangerous cross-map movements. Finally, many forget that objective progress saves between sessions, unnecessarily risking completed objectives by continuing with depleted resources.
Understanding these Pax Armata principles of tactical movement and resource conservation will serve you well not just for this quest but throughout your Arc Raiders career. For broader strategic context, consult our comprehensive Battlefield 6 Complete Guide which covers many transferable combat concepts.
Action Checklist
- Equip disposable loadout to minimize potential losses
- Coordinate with squad to divide objectives if playing in group
- Set precise map markers for all four objective locations
- Complete objectives in order of proximity to spawn points
- Remain vigilant for ARC patrols and player ambushes in high-traffic zones
- Extract safely after completing objectives to preserve progress
No reproduction without permission:Game Guides » ‘A First Foothold’ quest walkthrough in Arc Raiders Complete Arc Raiders quest guide with squad strategies, location tips, and survival tactics for Blue Gate objectives