TL;DR
- Use Warp Gongs in village centers to summon Eelavators for free layer-to-layer travel
- Activate golden tuning forks as checkpoints for instant teleportation within layers
- Hire Architectones to build Getaways for customized fast travel points
- Fast travel unlocks after reaching Hilltop Layer (SL200) and remains completely free
- Combine multiple travel methods for optimal backtracking and collection efficiency
Navigating Donkey Kong Bananza’s underground world requires strategic movement between its diverse layers. As you delve deeper toward the world’s core, you’ll inevitably need to return to earlier areas to complete collections or revisit merchants.
Your expedition through Donkey Kong Bananza’s subterranean realms will frequently necessitate returning to upper layers. Whether you’re hunting elusive Banandium Gems or expanding your wardrobe collection, backtracking to previously explored layers offers substantial gameplay advantages for completionists and casual players alike.
This comprehensive guide details how to fast travel between layers in Donkey Kong Bananza alongside efficient methods for navigation within individual layers.
While Donkey Kong Bananza’s campaign progression pushes you forward to new territories, you can fast travel to previous layers by utilizing the Warp Gong system. This essential travel mechanic becomes accessible once you’ve conquered the Hilltop Layer at SL200 depth.
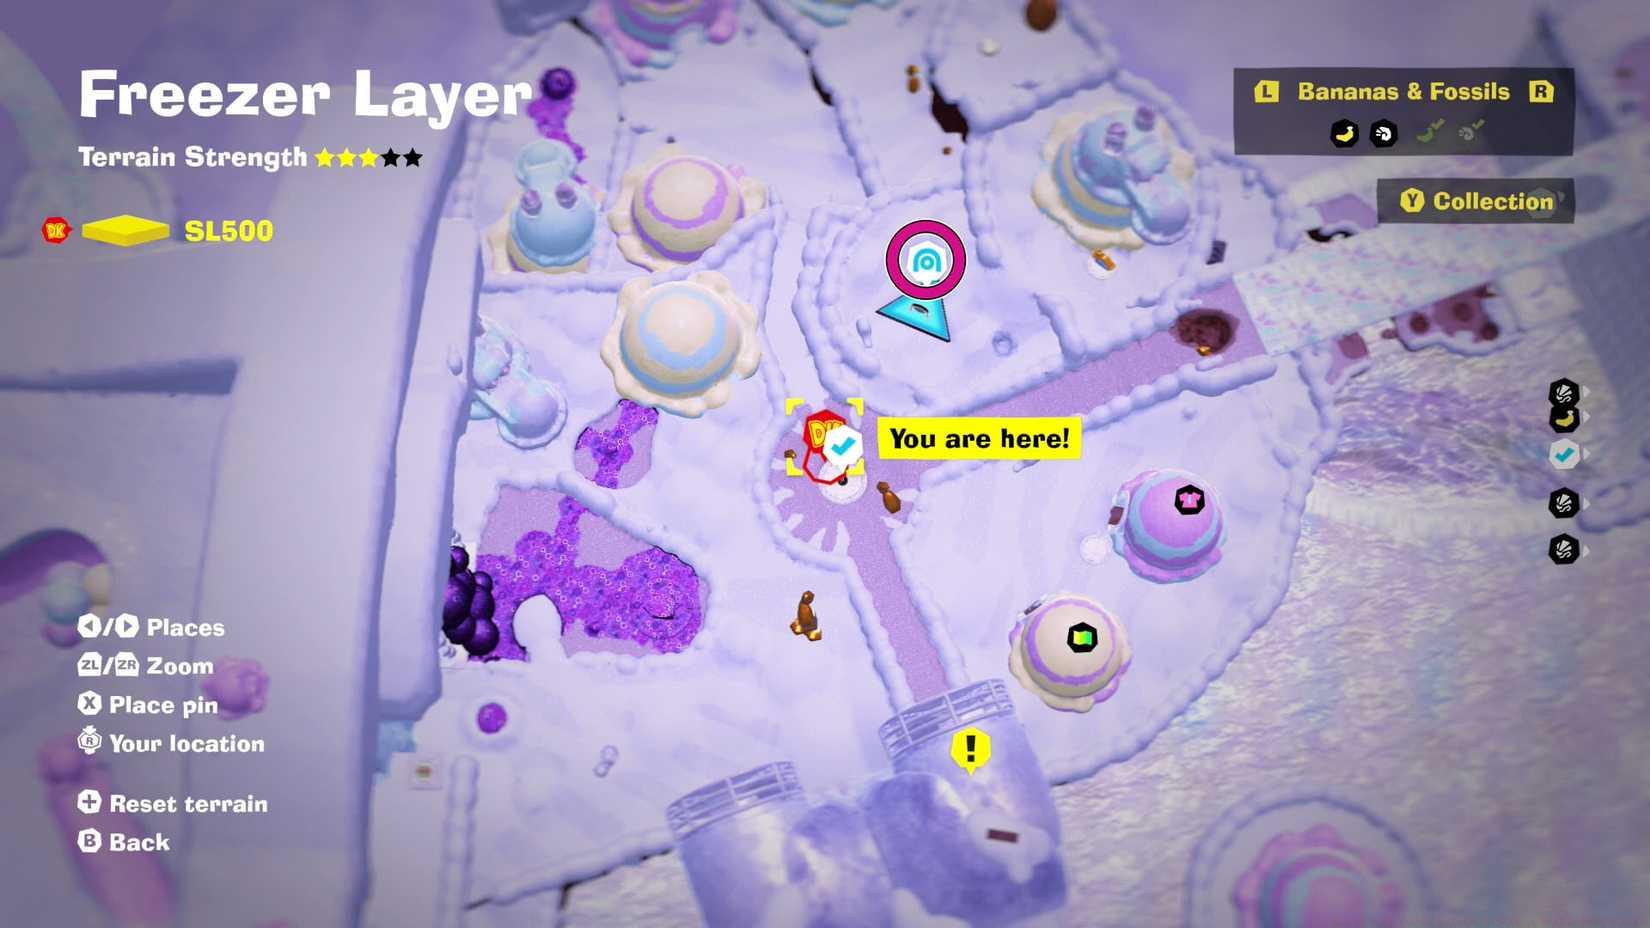
Image: Nintendo EPD/Nintendo via Polygon
Within the central settlements of each layer, locate the distinctive Warp Gong marked by a vivid blue archway symbol encircling a sphere. Identify these transport hubs by seeking out illuminated triangular platforms typically situated near commercial establishments within village boundaries.
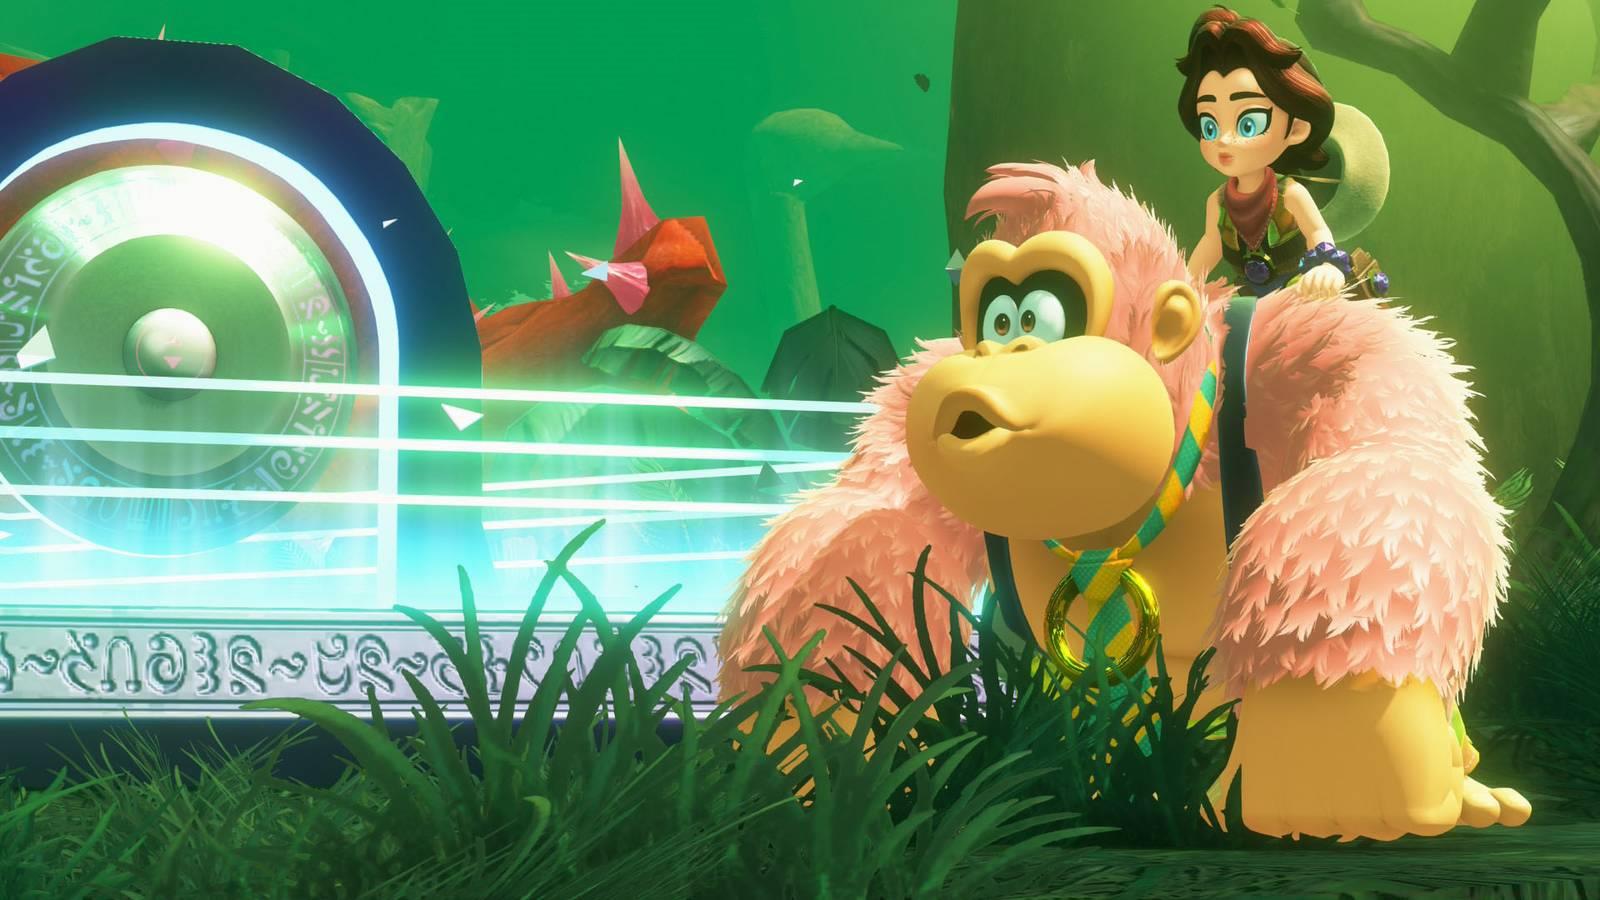
To engage the travel mechanism, embrace the Bananza spirit and deliver a powerful punch to the gong. This action summons the Eelavator – a massive eel-inspired creature capable of transporting you between different underground strata.
Transportation remains restricted to layers you’ve previously unlocked through gameplay progression. Importantly, teleportation between layers involves absolutely no financial cost. Liberally utilize the Eelavator’s services without economic concerns to revisit earlier zones and retrieve overlooked collectibles.
Many sublayers in Donkey Kong Bananza feature expansive layouts where traversing between sections via walking or Turf Surfing proves time-consuming. The game provides checkpoint-based teleportation (sometimes called “teeleportation”) for rapid relocation to key locations.
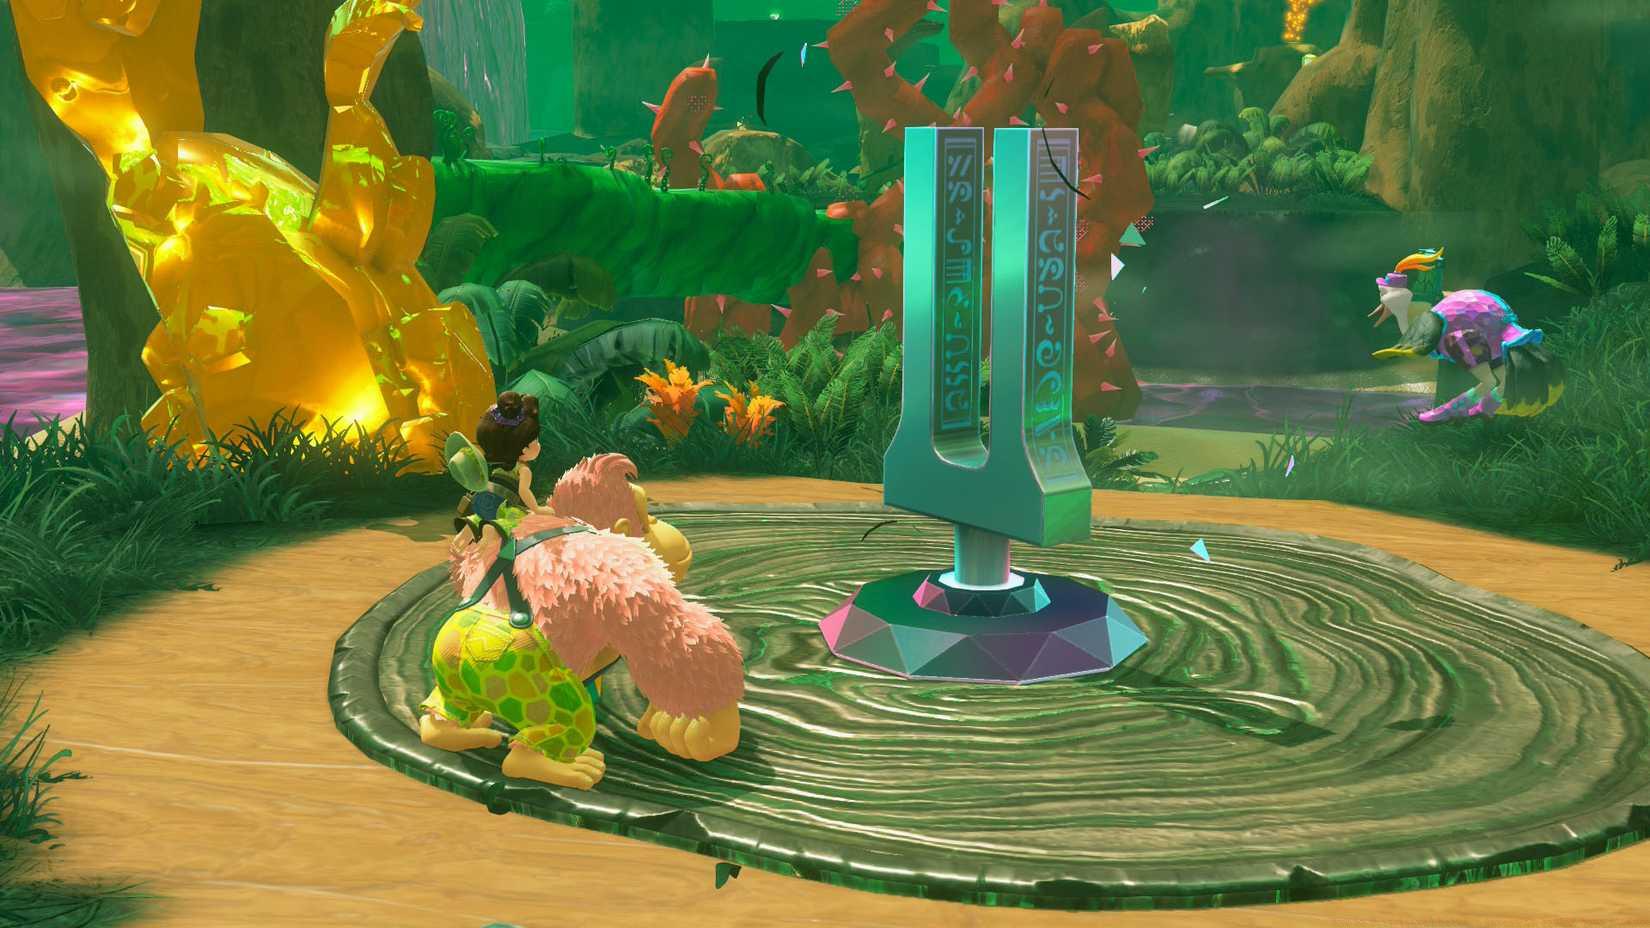
Image: Nintendo EPD/Nintendo via Polygon
Throughout your Donkey Kong Bananza adventure, you’ll frequently encounter tuning forks encased in golden formations at strategically significant locations within each layer. After liberating these artifacts, they transform into permanent checkpoints. To teleport to activated forks, access your minimap interface and choose the checkpoint nearest your desired destination.
Checkpoints aren’t your only option for rapid intra-layer movement. When you discover an Architectone – distinctive structures with blue walls and yellow ceilings resembling fractal houses – you can invest gold to commission construction of a Getaway portal.
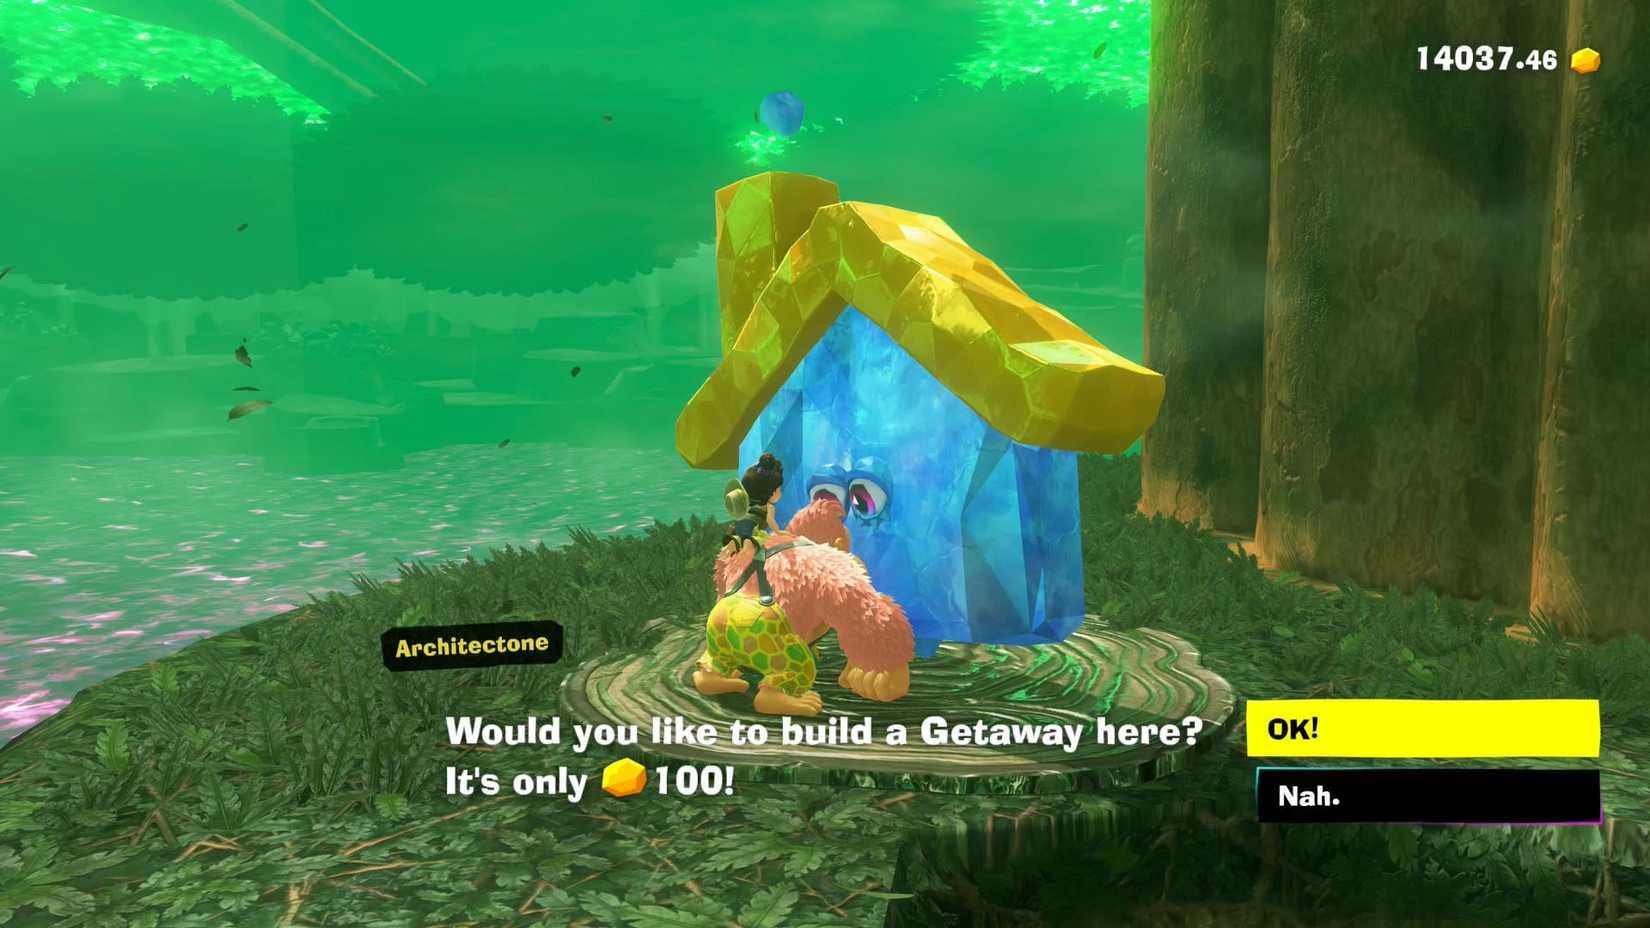
Image: Nintendo EPD/Nintendo via Polygon
Pro Tip: Prioritize activating tuning forks near difficult platforming sections or valuable resource clusters. The small time investment to free them pays dividends throughout your playthrough.
Common Mistake: Many players overlook Getaway construction in early layers, then waste excessive time backtracking through complex terrain later. Budget gold for at least one strategic Getaway per major layer.
Mastering Donkey Kong Bananza’s travel systems requires understanding their synergies and limitations. Layer travel via Warp Gongs works seamlessly with intra-layer checkpoint systems for maximum efficiency.
Optimal Route Planning: When backtracking for collectibles, always Warp Gong to your target layer’s main village, then use checkpoints to reach specific areas. This two-tier approach minimizes traversal time significantly.
Resource Management: While layer travel remains free, Getaway construction costs gold. Reserve this investment for layers with particularly spread-out collectibles or those requiring frequent revisits for time-sensitive challenges.
Progression Timing: The Hilltop Layer (SL200) unlock requirement means you’ll need to progress substantially before fast travel becomes available. Plan your initial exploration accordingly, noting locations you’ll want to revisit later.
Advanced Technique: For speedruns or efficiency play, sequence your layer progression to minimize backtracking. Complete all objectives in a layer before moving deeper, reducing later travel requirements.
Understanding these travel systems will enhance your Complete Guide approach to Donkey Kong Bananza, much like mastering movement in other complex games.
Action Checklist
- Reach Hilltop Layer (SL200) to unlock Warp Gong system
- Locate and punch Warp Gongs in village centers for free layer travel
- Liberate golden tuning forks to establish checkpoint teleportation points
- Invest gold in Architectones to build custom Getaway portals
- Combine travel methods for efficient collectible backtracking
No reproduction without permission:Game Guides » How to fast travel between layers in Donkey Kong Bananza Master Donkey Kong Bananza's fast travel systems to efficiently backtrack and collect missed items