TL;DR
- Destroy nine beaver crests around Town Hall Square to unlock the Breslau Blade
- Use ranged weapons for hard-to-reach crests and prepare for zombie encounters
- The sword comes with a blueprint for unlimited crafting at workshops
- Strategic positioning and weapon selection are crucial for efficiency
- Complete the challenge early game for a powerful legendary weapon advantage
Acquiring the legendary statue sword, officially named the Breslau Blade, represents one of the most rewarding early-game challenges in Dying Light: The Beast. This one-handed machete-class weapon delivers exceptional damage output against zombie hordes while remaining accessible during the initial stages of your survival journey.
The Breslau Blade stands out not just for its combat effectiveness but for its unique acquisition method. Unlike typical weapon finds, this legendary item requires completing an environmental puzzle centered around Town Hall Square. Successfully navigating this challenge provides both the weapon itself and its crafting blueprint, ensuring you can maintain this powerful tool throughout your gameplay.
Before attempting the crest destruction challenge, ensure you have appropriate equipment. While some crests can be shattered with melee weapons, the majority require ranged options due to their elevated positions. A crossbow serves as an ideal choice for its silent operation, while shotguns provide instant destruction at the cost of attracting unwanted attention.
Combat preparation is essential when using loud firearms. Shotgun blasts will inevitably draw volatile zombies to your position, so equip yourself with throwable weapons, medkits, and escape routes. The noise generated from breaking crests accumulates, potentially creating increasingly dangerous situations with each destroyed plate.
Graphic: Marloes Valentina Stella/Polygon | Source images: Techland via Polygon
Weapon effectiveness varies significantly against the stone crests. Most players find that two to three melee strikes, two crossbow bolts, or a single shotgun blast will destroy each crest. If your attacks prove ineffective, consider upgrading your weapon’s damage output or locating a more powerful alternative before continuing.
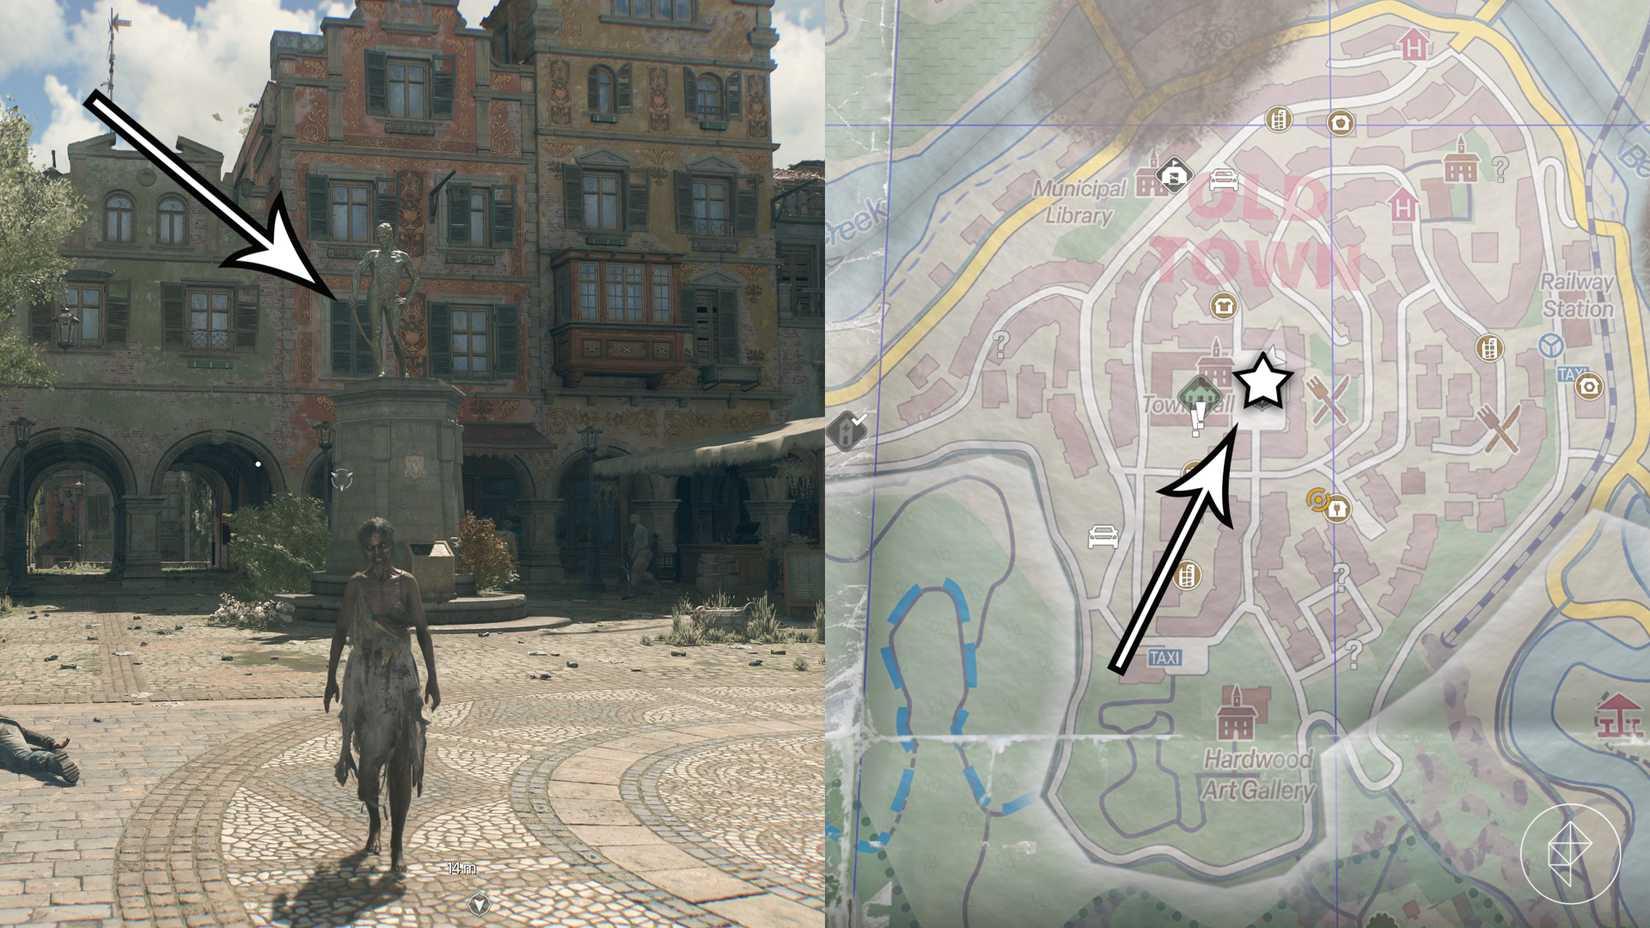
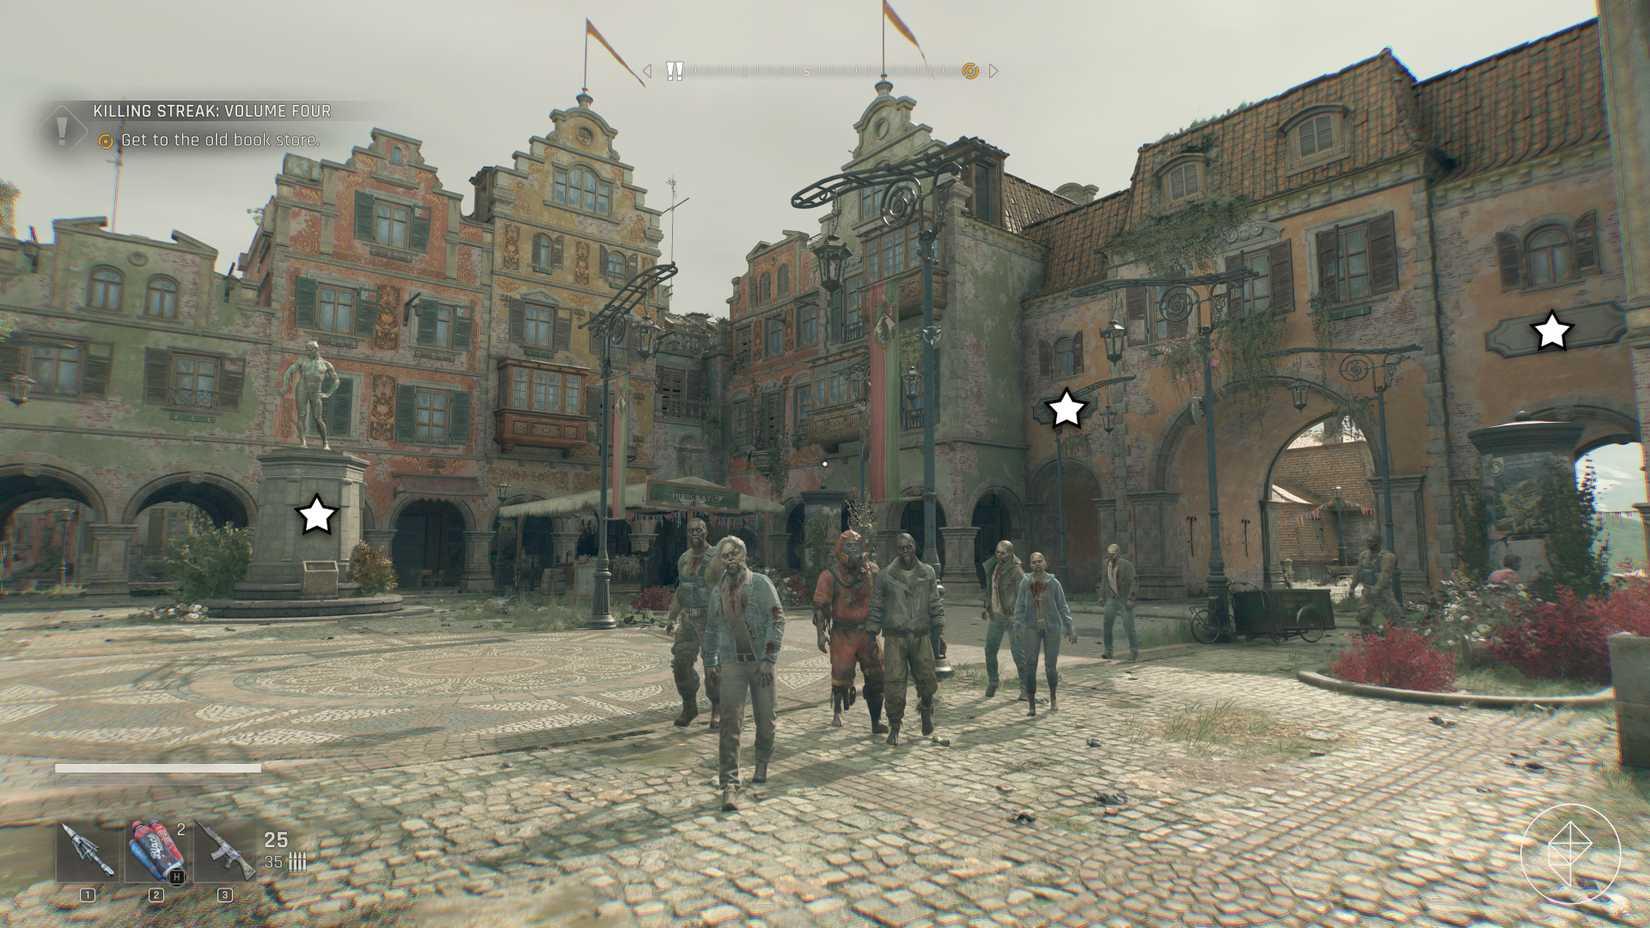
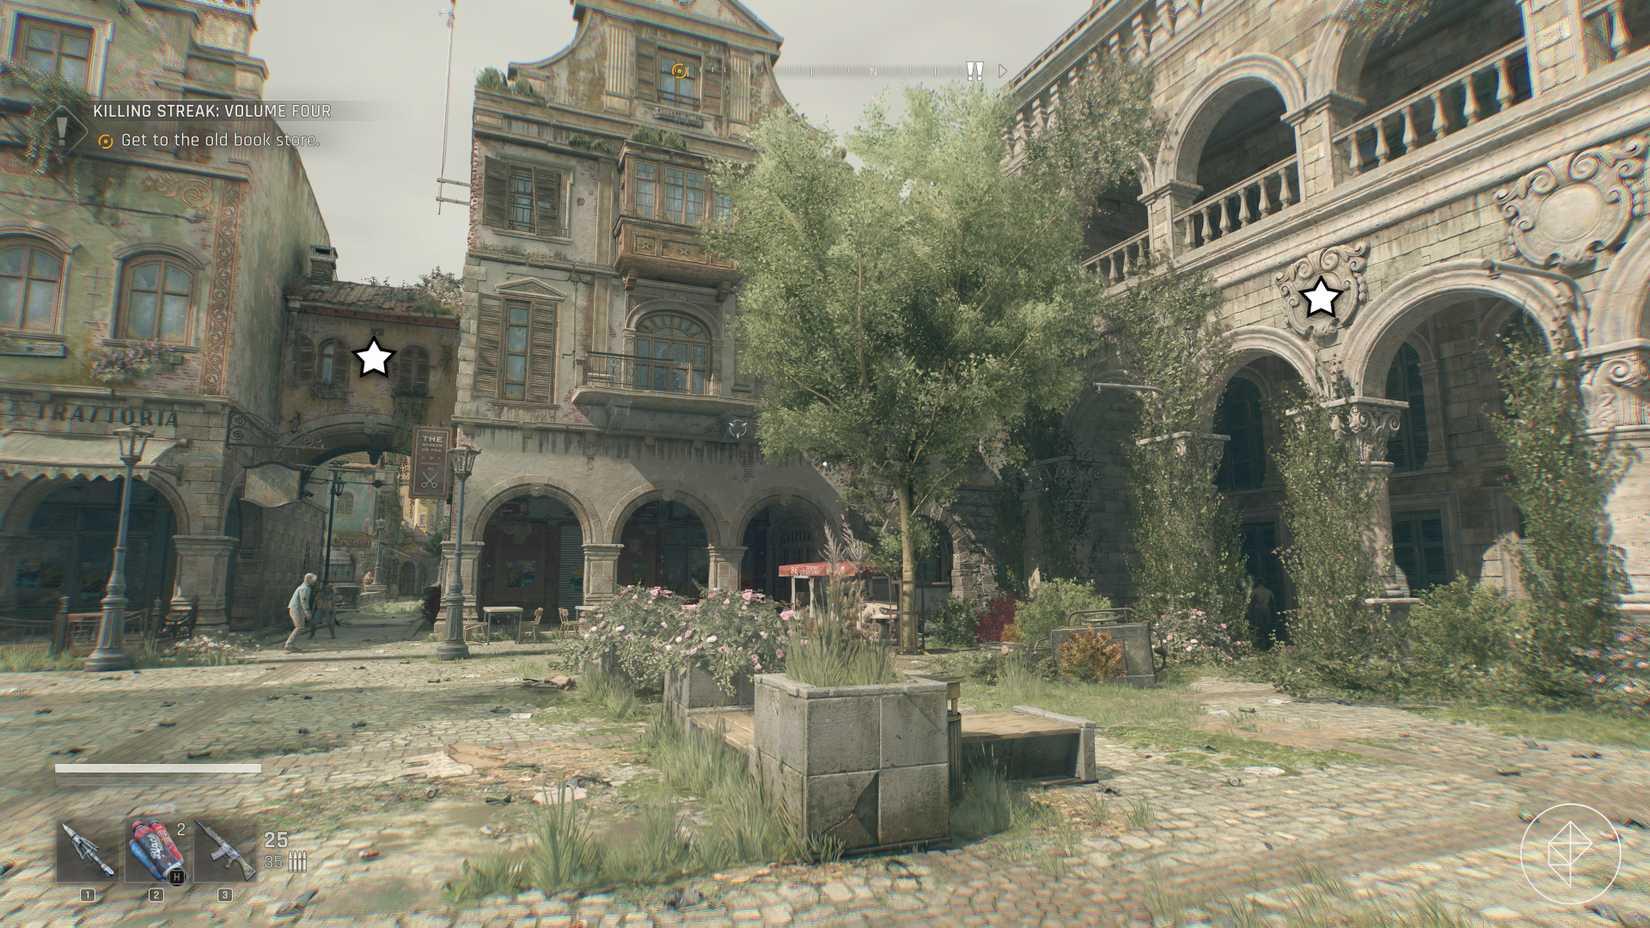
The nine beaver-adorned crests surround Town Hall Square in three distinct clusters. Methodical destruction following this geographic grouping ensures no crest goes overlooked and minimizes backtracking.
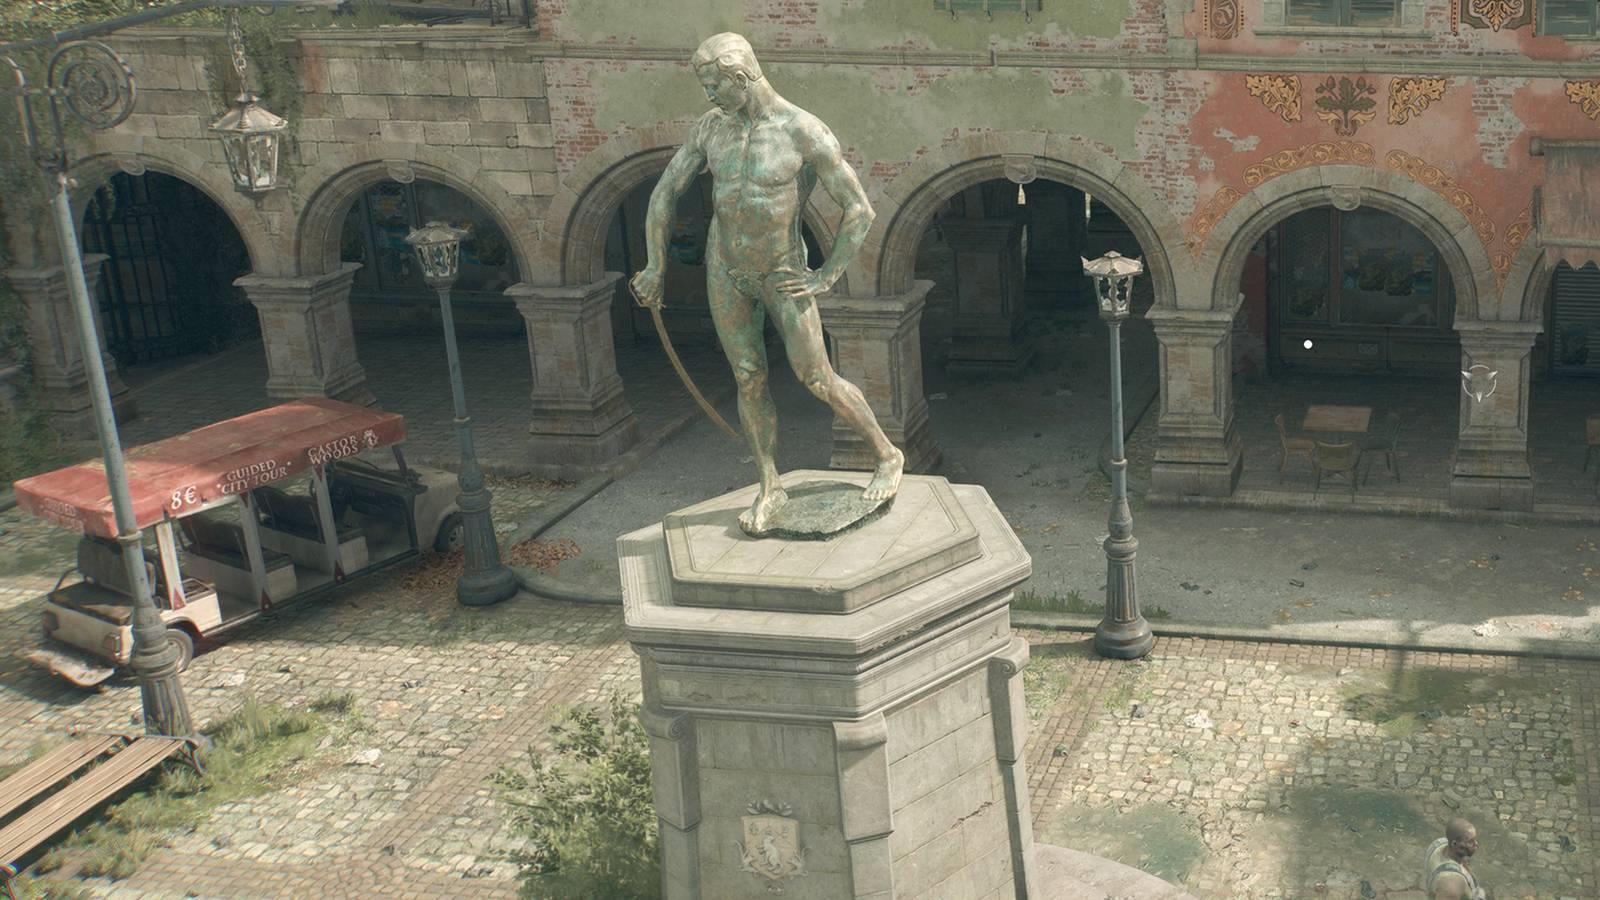
First Cluster – Three Crests: Position yourself facing the statue directly. The initial crest rests on the statue’s base, easily visible at eye level. The remaining two adorn the sides of the adjacent yellow building, positioned at approximately second-story height. These require ranged weapons or careful platforming to reach.
Graphic: Marloes Valentina Stella/Polygon | Source images: Techland via Polygon
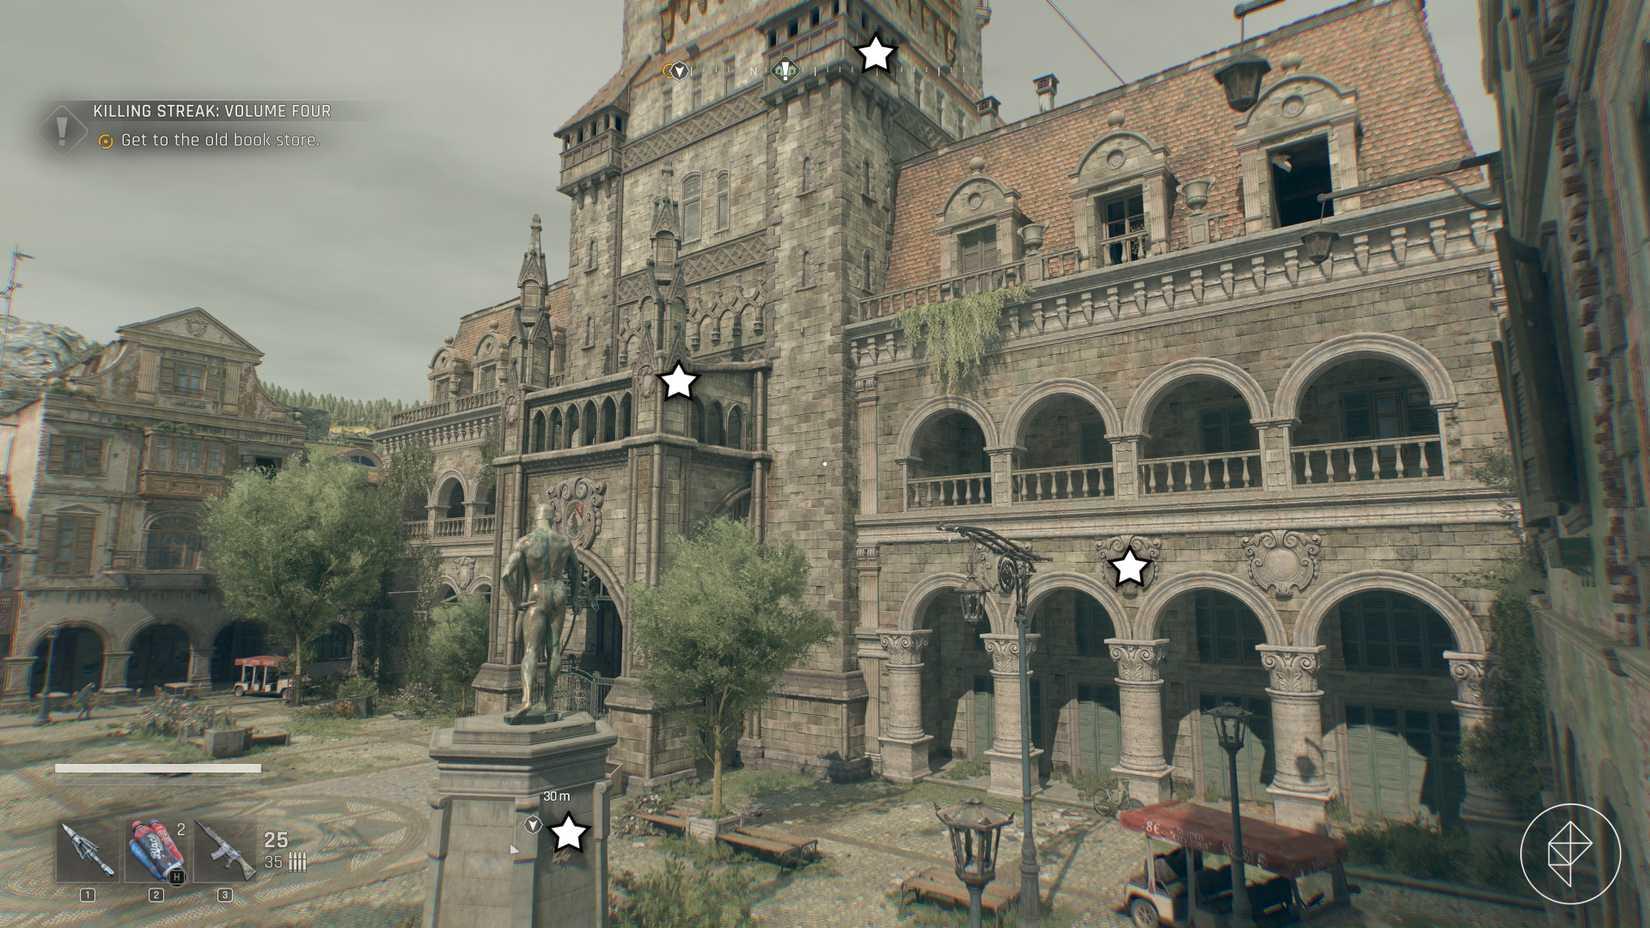
Second Cluster – Four Crests: Move behind the statue facing Town Hall. You’ll discover another crest on the statue’s reverse side, followed by one on the lower wall of Town Hall, another above the main entrance, and the highest placement on the building’s upper facade. This final crest presents the greatest challenge, often requiring long-range weaponry.
Graphic: Marloes Valentina Stella/Polygon | Source images: Techland via Polygon
For players lacking appropriate ranged options, an alternative approach exists for the highest crest. Utilize the red-roofed tour vehicle to access the buildings to the right, then navigate across rooftops to reach the Town Hall’s upper ledge. This parkour route demands precise jumping but avoids weapon requirements.
Final Cluster – Two Crests: With your back to the statue, scan the southwest corner wall for the eighth crest. The ninth and final crest occupies the small bridge house structure visible from this position. These typically prove easiest to destroy, being at or near ground level.
Graphic: Marloes Valentina Stella/Polygon | Source images: Techland via Polygon
After destroying the final crest, return to the statue and locate the inscribed plate reading “Castor Woods, Undefeated Fighter.” Interaction triggers a celebratory fireworks display, signaling successful challenge completion. The statue will now release its grip on the Breslau Blade, allowing you to climb up and claim your legendary reward.
Beyond acquiring the physical weapon, you automatically unlock the Breslau Blade blueprint at all workshops. This permanent addition to your crafting repertoire lets you recreate this powerful machete whenever needed, provided you have the necessary resources. The blueprint represents the true long-term value of this challenge, transforming a single weapon acquisition into an unlimited supply.
Strategic players should complete this challenge early in their Dying Light: The Beast progression. The Breslau Blade significantly outperforms most early-game weapons, while the blueprint ensures you maintain this combat advantage throughout the mid-game. For players seeking additional combat options, our Weapons Unlock guide provides comprehensive strategies for expanding your arsenal.
Action Checklist
- Acquire crossbow or shotgun for ranged crest destruction
- Destroy three crests facing the statue and yellow building
- Eliminate four crests behind statue on Town Hall building
- Break final two crests with back to statue in southwest area
- Interact with statue plate and claim Breslau Blade + blueprint
No reproduction without permission:Game Guides » How to get the Breslau Blade ‘Statue Sword’ in Dying Light: The Beast Complete guide to obtaining the Breslau Blade by destroying nine crests around Town Hall Square in Dying Light: The Beast