TL;DR
- Locate Blue Keycard in Utility Closet immediately after tutorial section
- Find missing switch in Locker Room after accessing Breaker Room
- Solve four-light puzzle using strategic switch combinations
- Adjust game brightness settings for optimal dark environment navigation
- Complete power activation to unlock full bunker exploration capabilities
Mastering the energy generator challenge requires strategic navigation through Missile Command Delta’s underground complex. Success hinges on securing the essential Blue Keycard and locating the critical missing lever component.
Activating the electrical systems within Missile Command Delta reveals an impressive Cold War-era missile detection facility. However, this process demands completing multiple objectives: obtaining security clearance, repairing damaged equipment, and solving a complex power distribution puzzle.
For players ready to illuminate the underground facility, this guide details the precise location of the missing power switch and provides expert techniques to master the Breaker Room puzzle mechanics.
Following the introductory tutorial sequence, your squad descends into the pitch-black underground installation. Team member Marta will assign the primary objective: restore facility power to enable full operational capability.
Navigate toward the power generation equipment by moving left from the bunker entrance, proceeding through the corridor positioned behind character Adel.
Continue along the rightward path. The initial doorway remains secured, but the secondary door on the right side provides access. This area serves as the Utility Closet storage room.
Given the extreme darkness complicating navigation, minimize unnecessary movement. Immediately retrieve the Blue Keycard from the table directly inside the doorway. This security pass rests on a notification panel alongside an access credential (essential for computer terminal operations later). If visibility becomes problematic, temporarily increase brightness settings within the game’s display options for improved orientation.
Return along your original path. Recall the previously inaccessible door? With the Blue Keycard now in your inventory, you can unlock this barrier. Engage with the security panel mounted on the door’s left side. This secured area constitutes the Breaker Room, housing the primary power generation equipment.
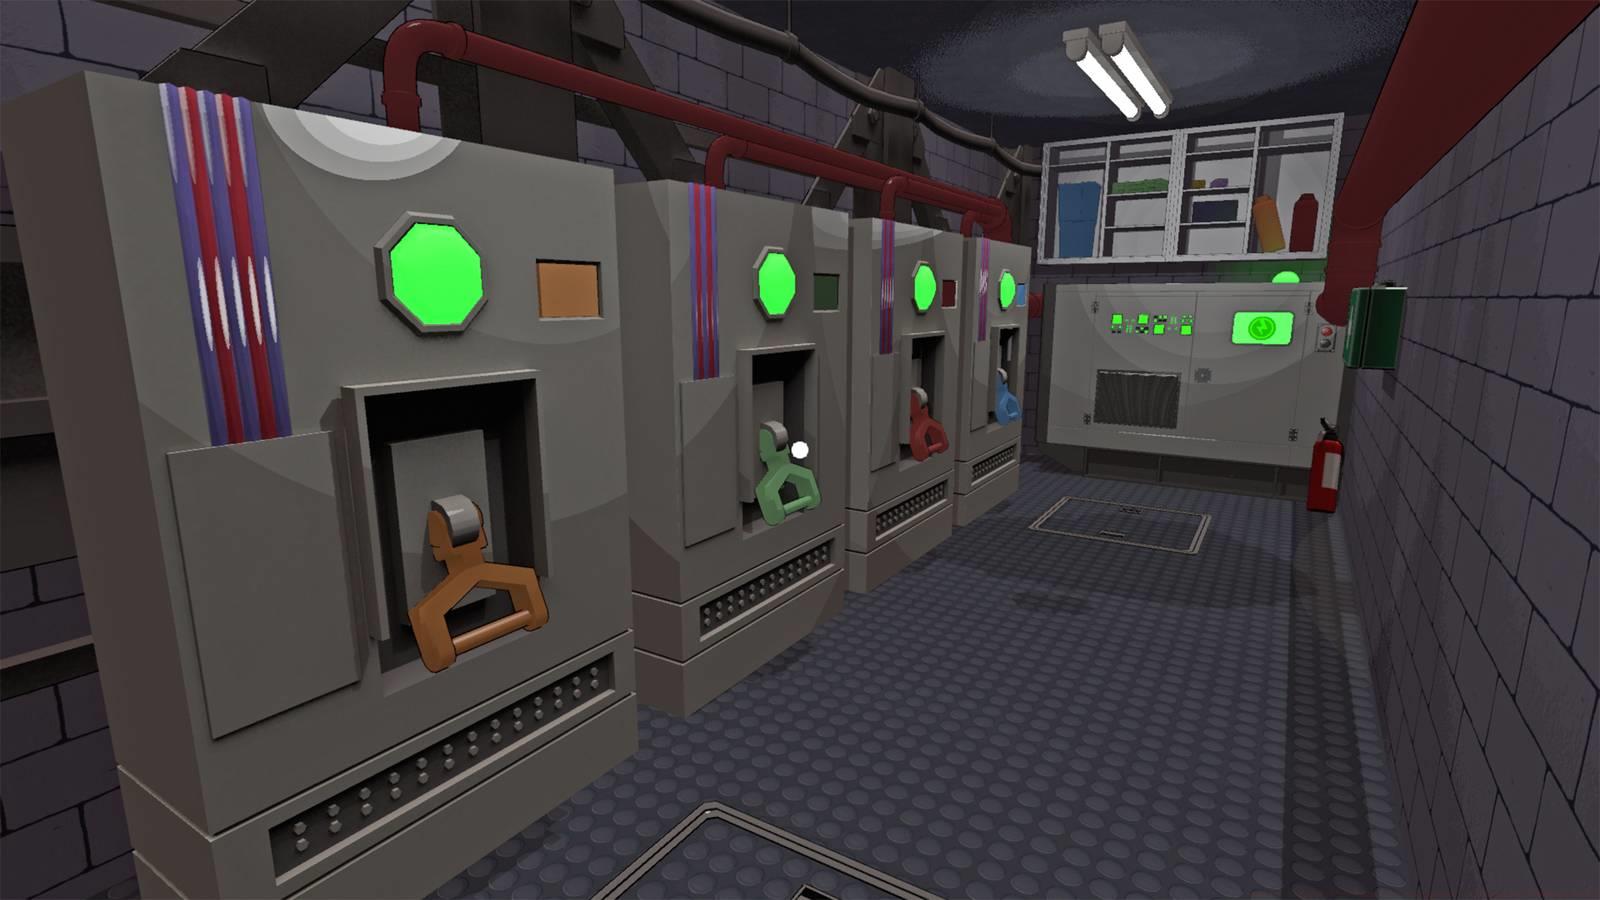
Within this chamber, examine the left wall to identify four indicator lights (displaying either red or green status) alongside three operational switches. Critically, the second indicator lacks its corresponding switch mechanism! You must recover this component before addressing the energy distribution challenge.
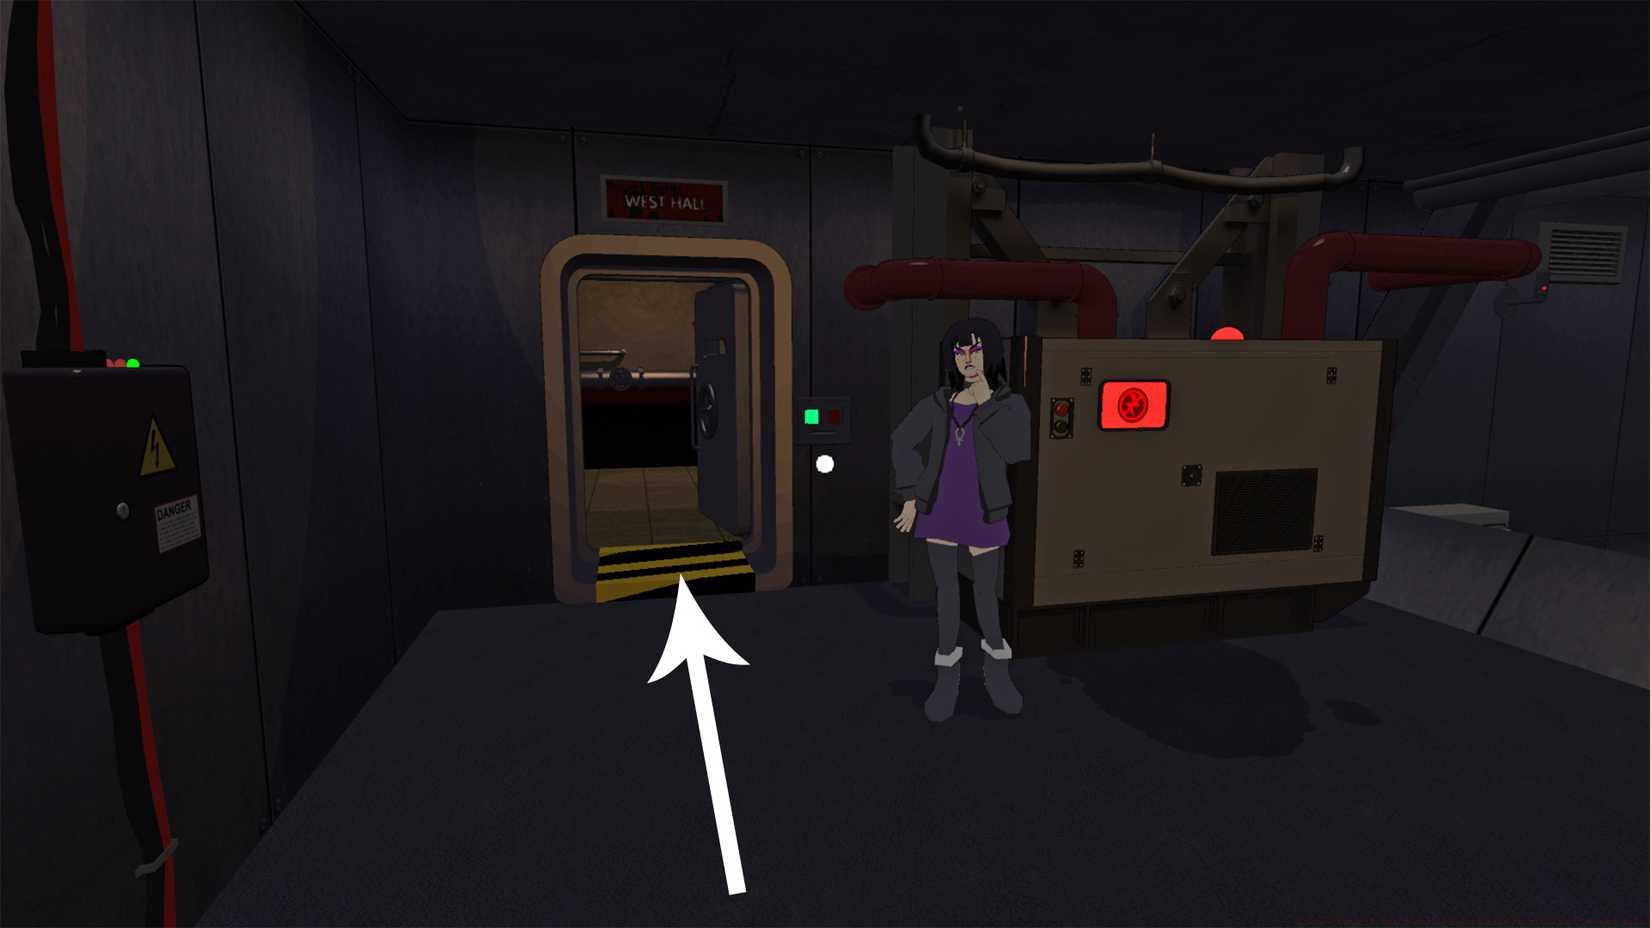
Image: 13AM Games/Mighty Yell via Polygon
Exit back into the main corridor. Proceed rightward toward the Utility Room area, but this time, enter the first doorway on your left, which accesses the Locker Room facilities.

Image: 13AM Games/Mighty Yell via Polygon
Advanced Strategy: Thoroughly search locker compartments and maintenance benches for the missing switch component. Many players overlook secondary interaction points, delaying progress. The switch typically spawns in predictable locations, but random generation elements can alter placement between playthroughs.
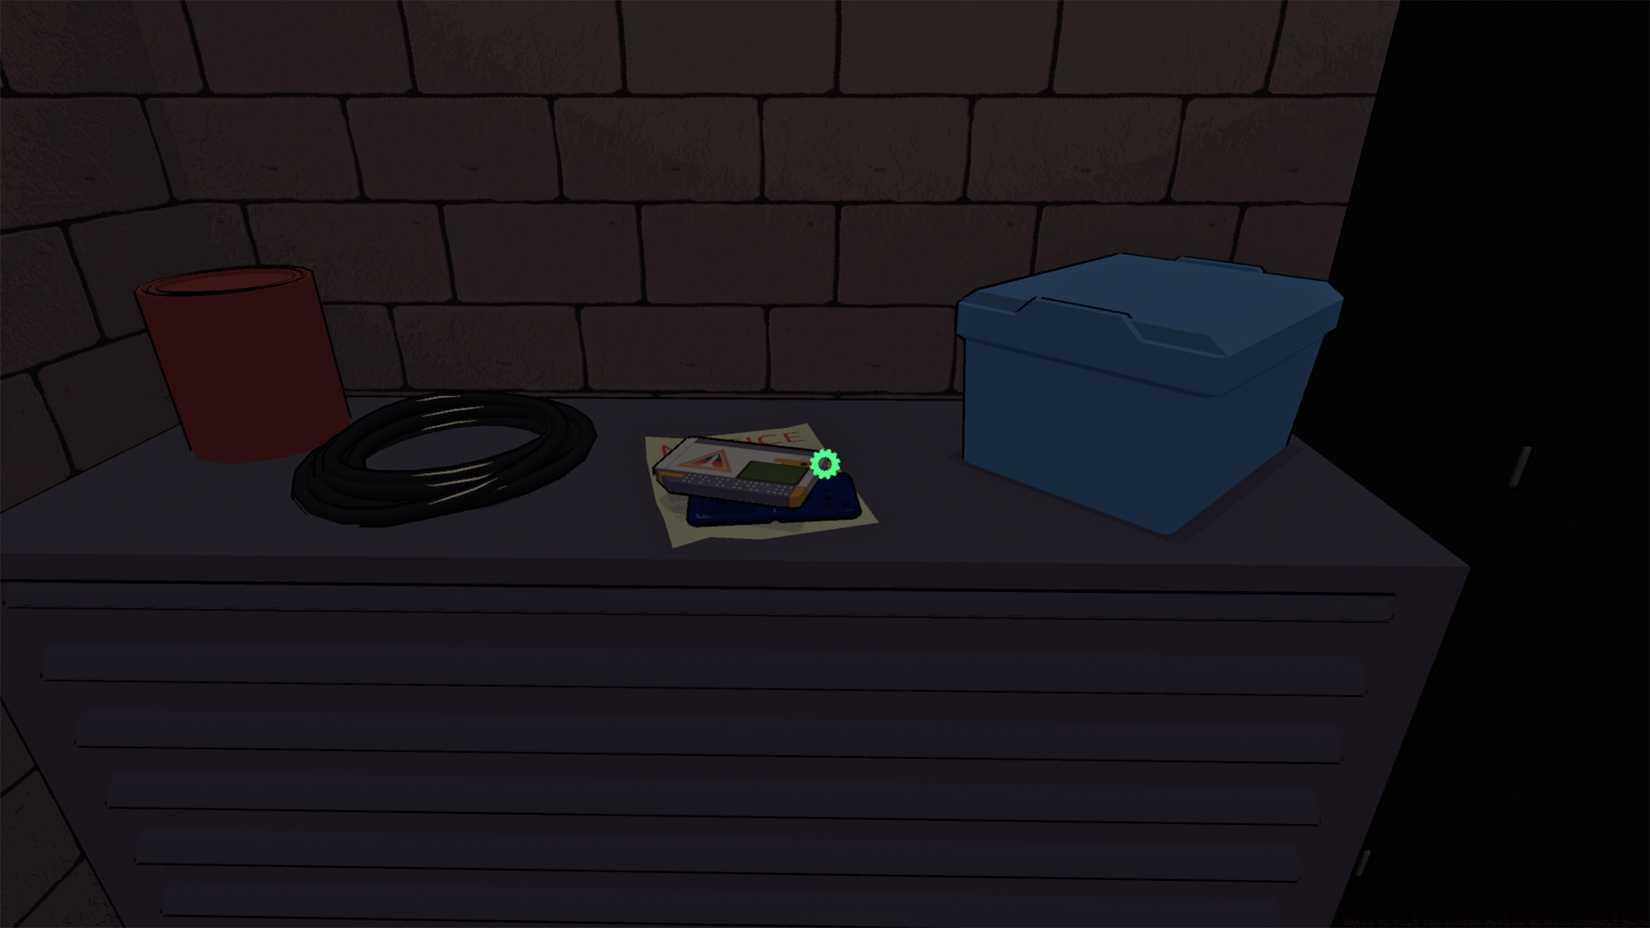
Image: 13AM Games/Mighty Yell via Polygon
With all four switches now available, return to the Breaker Room to solve the power distribution puzzle. The solution requires specific switch combinations to activate all four indicator lights simultaneously.
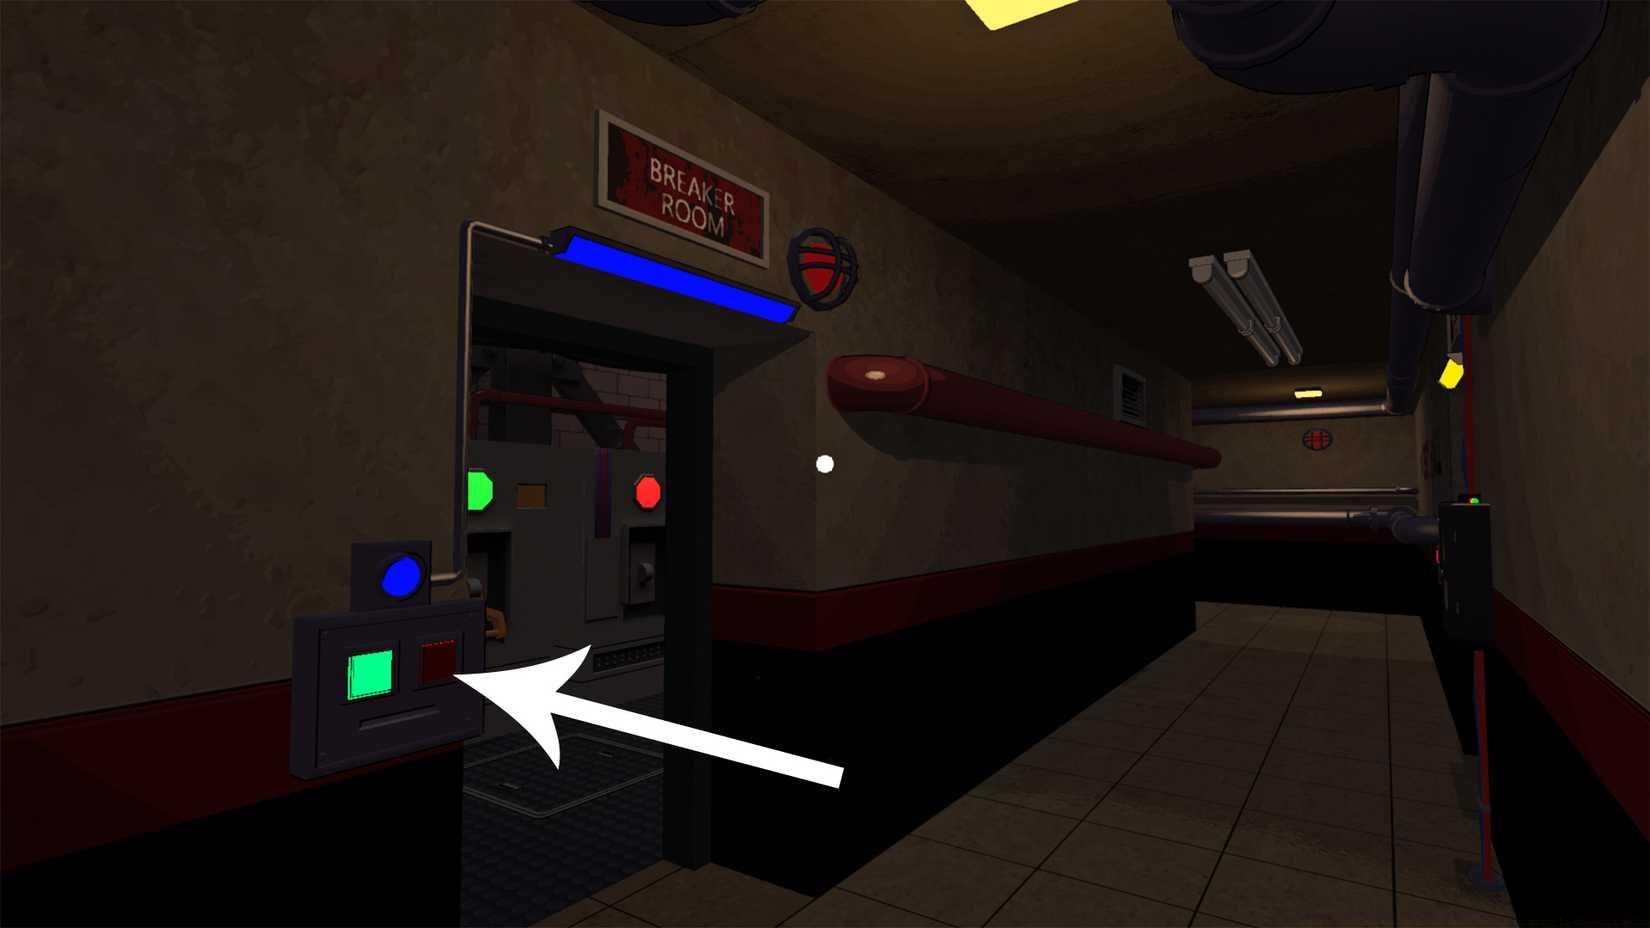
Image: 13AM Games/Mighty Yell via Polygon
Puzzle Mechanics: Each switch controls multiple circuits in a non-intuitive pattern. Switch 1 typically affects lights 1 and 3, Switch 2 (the recovered component) controls lights 2 and 4, Switch 3 influences lights 1 and 2, while Switch 4 manages lights 3 and 4. The optimal activation sequence is: toggle Switch 4, then Switch 2, followed by Switch 1, and finally Switch 3 if needed.
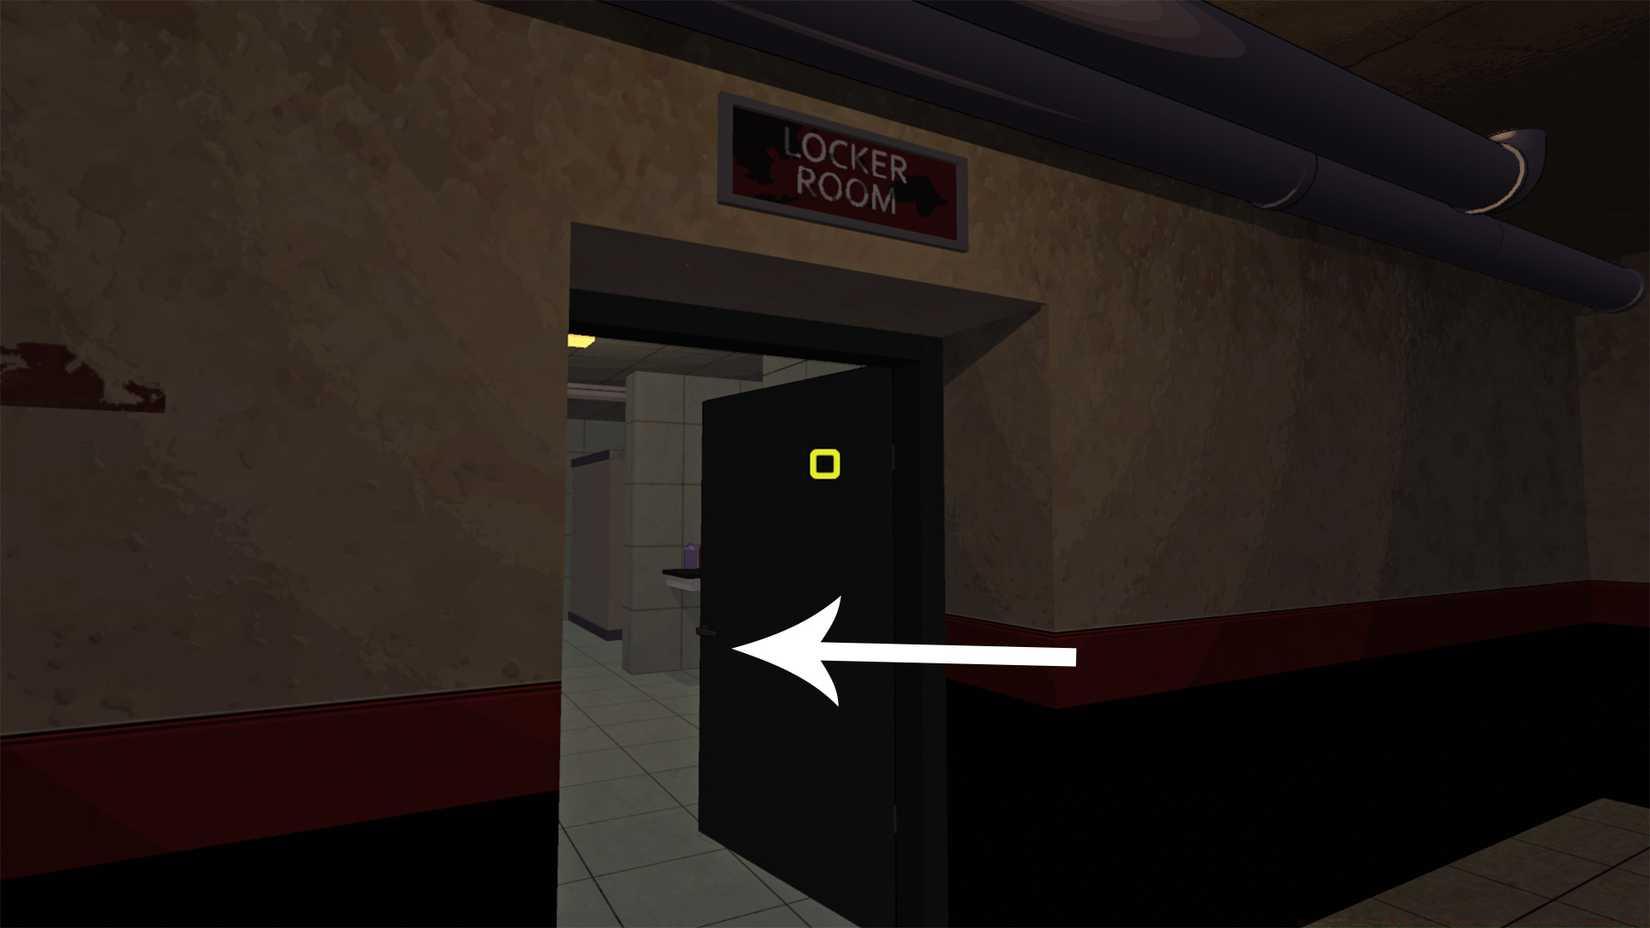
Image: 13AM Games/Mighty Yell via Polygon
Common Mistake: Players frequently reset switches randomly, creating unsolvable states. If you encounter difficulty, systematically reset all switches to their default positions and follow the prescribed sequence precisely. The puzzle incorporates logic gate mechanics where certain combinations create dependency loops.

Image: 13AM Games/Mighty Yell via Polygon
Completion Reward: Successfully activating all four lights restores full power to Missile Command Delta, illuminating the entire facility and unlocking access to advanced areas. This achievement progresses the main storyline and enables interaction with previously inaccessible computer terminals and equipment.
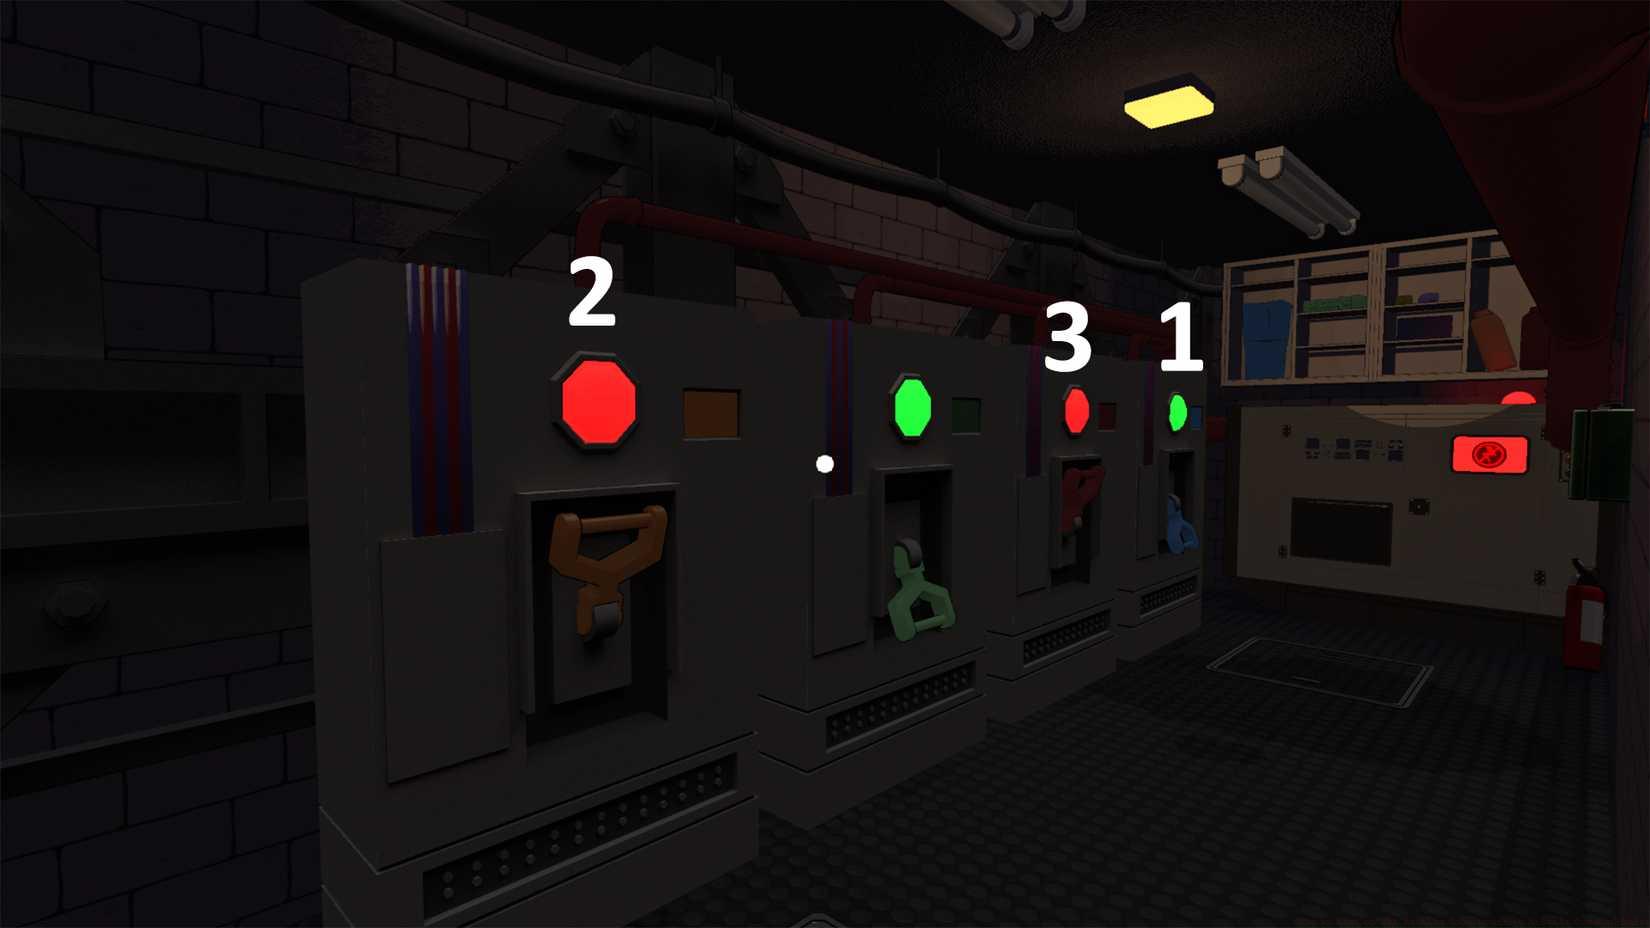
Image: 13AM Games/Mighty Yell via Polygon
Pro Tip: Document your switch combinations during experimentation. The puzzle solution remains consistent across playthroughs, allowing experienced players to complete this section in under three minutes once the pattern is memorized.
Action Checklist
- Navigate to Utility Closet and secure Blue Keycard
- Access Breaker Room using Blue Keycard
- Locate missing switch in Locker Room
- Solve four-light puzzle using optimal switch sequence
- Activate full power and proceed to next objectives
No reproduction without permission:Game Guides » How to turn on the Breaker Room power in Missile Command Delta Complete guide to activating power in Missile Command Delta with strategic tips and puzzle solutions