TL;DR
- Shell shards serve as Silksong’s primary crafting material for tool repair and quest completion
- Acquire shards through enemy drops and destructible deposits found throughout Pharloom
- Bench resting automatically consumes shards to replenish tool charges like the Straight Pin
- Early-game deposits provide substantial starting resources – don’t miss the +20 shard statue
- Shards persist through death, enabling risk-free exploration and resource gathering
How to effectively locate and utilize shell shards for comprehensive crafting systems
Shell Shards represent the foundational resource system within Hollow Knight: Silksong, though their specific applications may initially appear obscure to newcomers. These fragments quickly reveal their critical importance across multiple game systems, and our detailed examination will clarify their multifaceted roles.
From essential tool maintenance to specialized crafting requirements, this guide comprehensively details acquisition methods and strategic applications for Hollow Knight: Silksong shell shards. For enhanced navigation assistance throughout Pharloom’s diverse regions, consult our comprehensive Silksong interactive mapping resources.
There are two primary methods for accumulating shell shards throughout your Hollow Knight: Silksong journey:
The initial shell shard deposit becomes accessible immediately following game commencement. By ascending the right-side wall and demolishing the statue within the compact cavern, you’ll acquire +20 shell shards. This substantial initial resource allocation provides excellent early-game momentum!

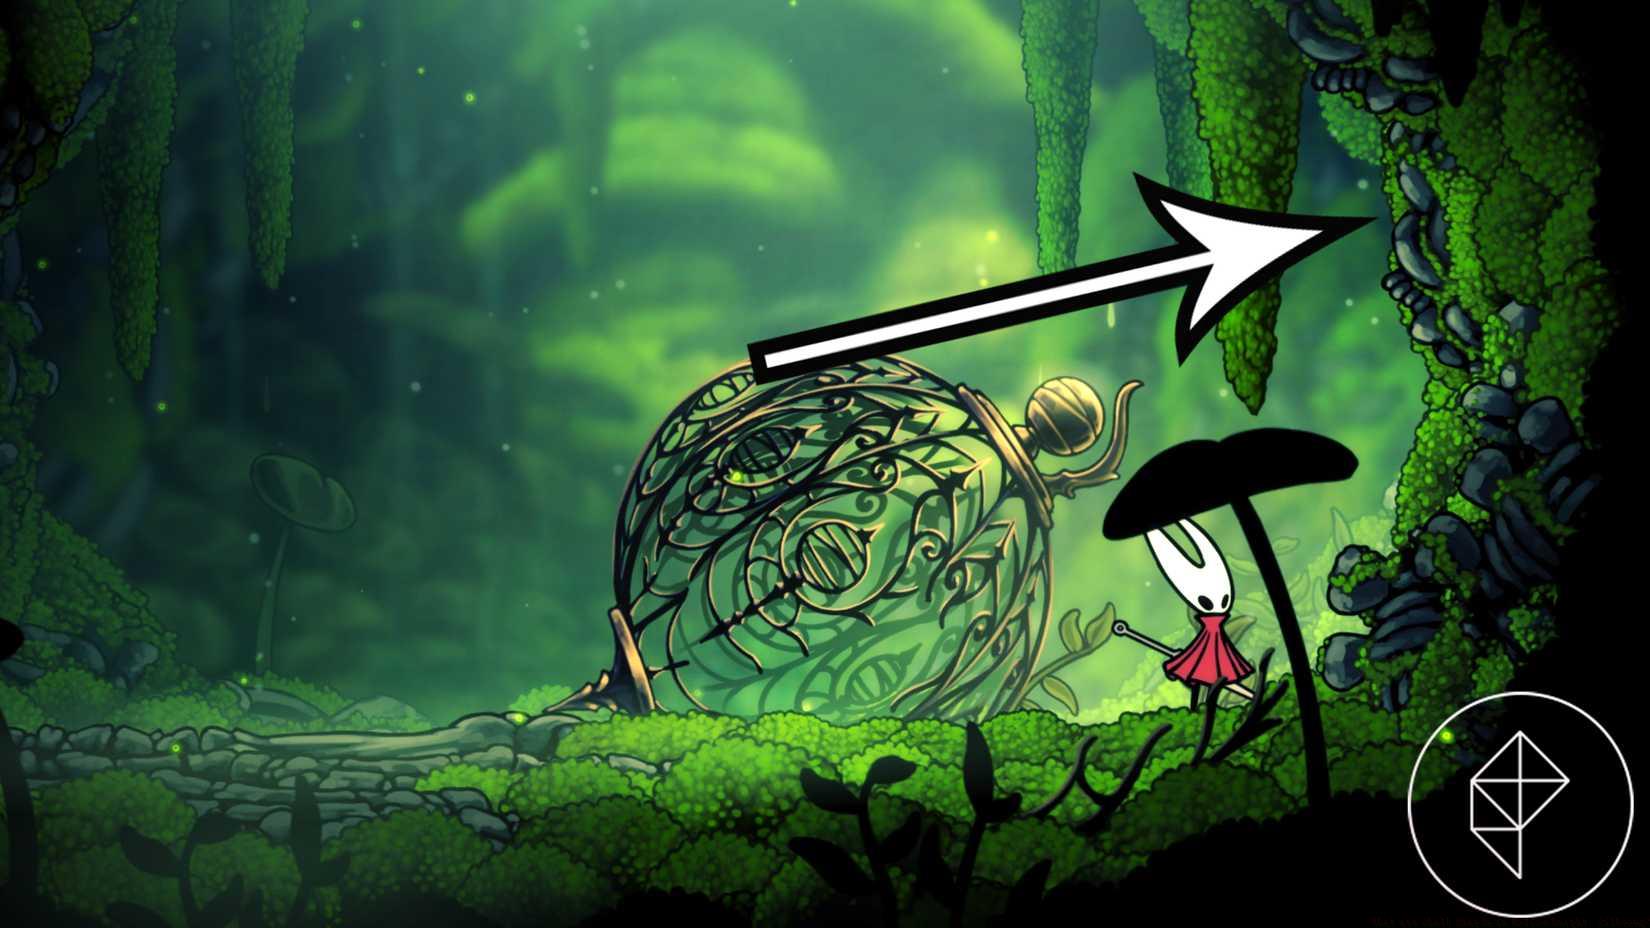
Graphic: Marloes Valentina Stella/Polygon Image: Team Cherry via Polygon
Distinct from rosary beads (dedicated vendor currency), shell shards function as multipurpose crafting components employed for tool fabrication and maintenance. During bench respite, your inventory automatically deploys shell shards to restore tool functionality, including the Straight Pin. The Straight Pin, alongside other red crest slot implements, operates with finite charge capacity, necessitating shell shard expenditure once depleted.
Certain wish fulfillment objectives (secondary missions) mandate shell shard contributions for successful resolution. These optional endeavors appear on mission boards within Bone Bottom and subsequent settlement hubs. Prioritize these quests as they often yield unique rewards disproportionate to their resource investment.
Fortunately, shell shard inventories remain intact following character demise, eliminating resource anxiety during hazardous exploration. This persistence mechanic encourages aggressive exploration and experimental combat approaches without permanent resource penalty.
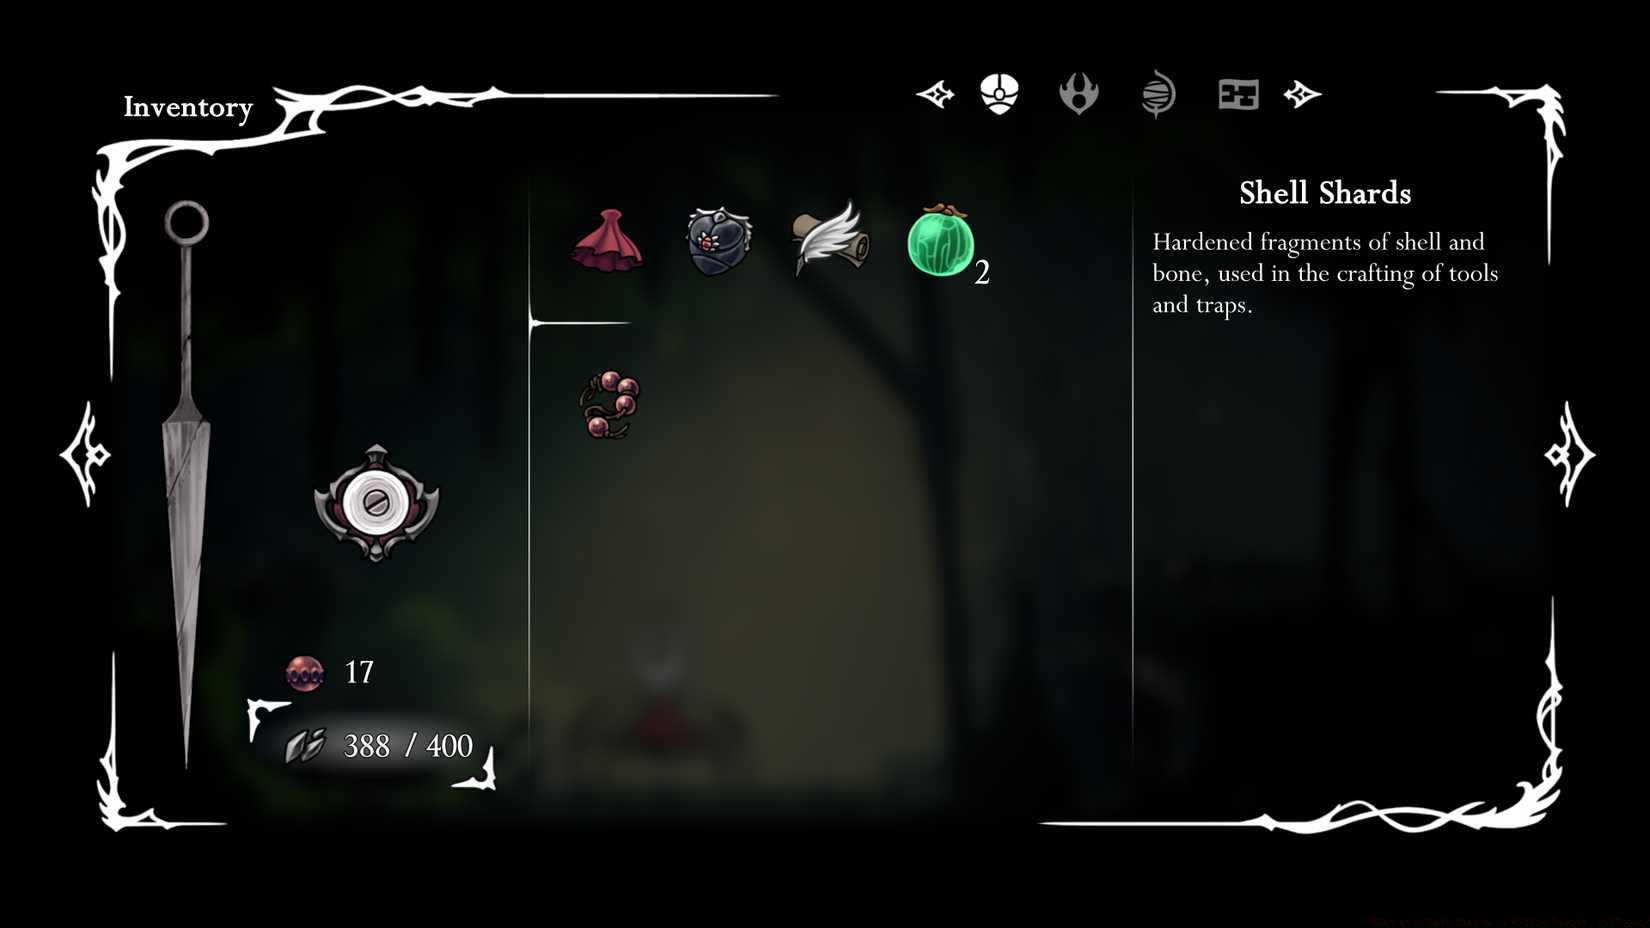
Image: Team Cherry via Polygon
Pro Tip: Maintain a minimum shard reserve of 50-100 units for unexpected tool emergencies. Advanced players should identify high-yield enemy farming routes near benches for efficient charge replenishment. Avoid exhausting your entire shard supply on single tool repairs—stagger your maintenance across multiple benches to ensure continuous tool availability during extended exploration sessions.
Action Checklist
- Locate and break the initial +20 shard statue in the starting area
- Establish enemy farming routes near benches for efficient shard accumulation
- Maintain 50-100 shard emergency reserve for unexpected tool repairs
- Complete shell shard donation quests at Bone Bottom task boards
- Identify flash-indicating deposits in each new region for optimal resource gathering
No reproduction without permission:Game Guides » What are Shell Shards in Hollow Knight: Silksong? Master shell shard mechanics in Hollow Knight: Silksong for optimal crafting and tool management